Tag: free safety training

In the dynamic landscape of contemporary workplaces, prioritizing safety is not just a legal requirement but a fundamental responsibility. Kevin Ian Schmidt Consulting stands as a beacon, offering a suite of Free Safety Training Downloads that redefine the approach to workplace safety, proving to be a game-changer for organizations across industries.

Expertise You Can Trust

Kevin Ian Schmidt Consulting boasts a team of seasoned experts with a wealth of knowledge in occupational safety. Their Free Safety Training Downloads distill this expertise into accessible and actionable resources, ensuring that organizations, regardless of size or sector, can benefit from the wisdom of seasoned professionals.

Tailored to Your Industry

Recognizing the diverse nature of industries, Kevin Ian Schmidt Consulting’s Free Safety Training Downloads are tailored to meet the specific needs of various sectors. Whether you’re in manufacturing, healthcare, construction, or any other field, the downloads provide industry-specific insights, addressing potential hazards and safety protocols relevant to your environment.

Comprehensive Compliance

Navigating the intricate web of safety regulations can be daunting. Kevin Ian Schmidt Consulting’s Free Safety Training Downloads function as a compass, guiding organizations through the intricacies of compliance. By staying updated with the latest legal requirements, businesses can mitigate risks, ensuring a secure and legally sound work environment.

Cost-Efficiency Redefined

One of the standout features of Kevin Ian Schmidt Consulting’s offerings is their commitment to accessibility. By providing Free Safety Training Downloads, they break down financial barriers that might prevent smaller businesses from accessing expert guidance. This democratization of safety resources fosters a culture of compliance, even for organizations with limited budgets.

Empowering Your Workforce

Safety isn’t just a set of rules; it’s a mindset. Kevin Ian Schmidt Consulting’s Free Safety Training Downloads go beyond compliance by empowering the workforce. The resources are designed not only to educate but to inspire a collective commitment to safety. Informed employees are proactive employees, contributing to a culture where safety is everyone’s responsibility.

Proactive Risk Mitigation

Preventing accidents is far more effective than reacting to them. The Free Safety Training Downloads incorporate a proactive approach to risk management. By identifying potential hazards and offering guidelines for their prevention, organizations can significantly reduce the likelihood of accidents, minimizing downtime and associated costs.

Continuous Improvement

In the ever-evolving landscape of workplace safety, staying stagnant is not an option. Kevin Ian Schmidt Consulting’s commitment to excellence is reflected in their continuous updates and enhancements to the Free Safety Training Downloads. Organizations can rely on these resources as living documents, ensuring they stay relevant and effective in addressing emerging safety challenges.

In conclusion, Kevin Ian Schmidt Consulting’s  Safety Training Downloads are a catalyst for transforming workplace safety from a compliance burden to a strategic advantage. By leveraging their expertise, tailoring resources to specific industries, ensuring compliance, and fostering a culture of empowerment, organizations can embark on a journey toward excellence in safety, ultimately creating workplaces where employees thrive and businesses flourish.

  • Back and Lifting Safety Training

    Back and Lifting Safety Training

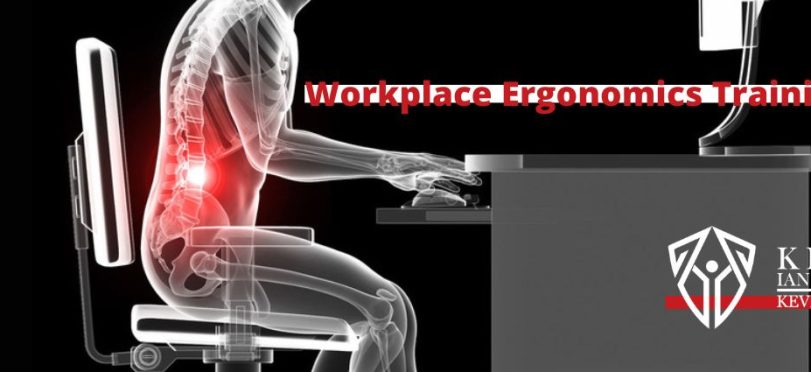
    Back injuries are a major cause of missed time – only second to the common cold! The majority of back injuries occur during lifting tasks and these injuries can be very costly for companies in lost productivity and insurance claims. In the short term, a back injury can cause serious discomfort and pain for the employee but in the long term, it can have a devastating effect on the employee’s lifestyle and ability to work.

    Here are 4 of the major causes of back injuries in the workplace:

    Insufficient Training: It’s easy to assume that everyone has an intuitive sense of how to lift and carry objects and knows how much they can safely lift by themselves. However, back injuries are extremely common and many people don’t understand the consequences of improper lifting and how they can lift safely. Any workplace that requires employees to lift heavy objects should cover the proper techniques as a part of basic safety training.

    Improper Lifting: Starting everyone off with proper safety training is essential, but knowledge and commitment to safe work practices can fade over time. Employees may become complacent in their lifting and develop bad habits that erode their technique and can result in injury. Reinforcement of lifting safety principles is important and supervisors or colleagues should correct employees using improper techniques. Safety reminders should be frequent but also varied so that they do not lose their impact. Consider reminding employees through a mix of email reminders, safety meetings, and workplace safety notices to keep lifting safety top of mind.

    Not Appreciating the Risk: If employees are regularly lifting things in the course of their job, they can become desensitized to the risk. This makes them more likely to make mistakes like lifting with poor posture, twisting while lifting, or lifting objects that are too heavy. If an employee has not experienced a back injury before and felt the pain for themselves, they may not realize the debilitating outcomes they are risking with poor lifting technique. Your safety training should explain how back injuries often become a chronic problem that can not only limit their ability to work, but also their ability to do basic tasks like getting out of a chair or playing with their kids. As an employer, you should make sure that workers understand their lifting limit and why they should respect it. It’s also important to schedule work to allow for breaks and create a balanced workday where employees don’t continuously work through physically demanding tasks.

    Rushing: Tight deadlines and long work days can cause employees to feel rushed and lifting technique can be compromised as a result. Many injuries occur when employees are under pressure and in a hurry because back strain is the last thing on their minds. Sometimes tight deadlines and workplace stress are unavoidable, but by understanding how that impacts safety and back health, you can try to schedule work appropriately and better support the safety of your workers.

    Remember that any type of safety training is only as good as its reinforcement. Regular reminders of proper lifting techniques are critical to prevent employees slipping into bad habits, and everyone should be encouraged to watch and correct unsafe work practices.

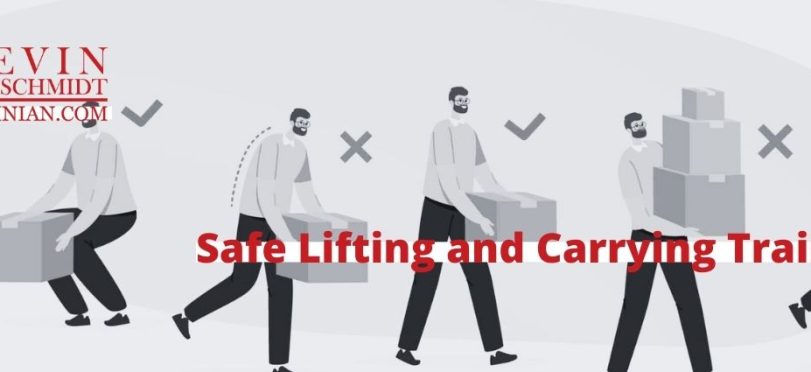
    Some essential Do’s and Don’ts of lift safely include:

    Do:
    • Try an eliminate manual lifting when possible.
    • Stay in good physical shape.
    • Make sure you have a good grip on any item you lift.
    • Test the weight and balance of the item to be lifted.
    • Ask for assistance if an item is too heavy or awkward to lift safely.
    • Keep the item being lifted close to your body.
    • Stand in a stable position and lift mostly by straightening your legs.

    Don’t:
    • Twist or bend in a sideways direction when lifting.
    • Lift or lower an object from an awkward position.
    • Lift or lower an object if your arms are extended.
    • Try and continue to lift an object if you realize it’s too heavy.
    • Lift anything above your shoulders or below your knees.

    Download and view the Back and Lifting Safety Training below


  • Workplace Ergonomics Training

    Workplace Ergonomics Training

    When we think about our daily routines, many people sit more than they stand throughout their day. We wake up in the morning and we sit to read the newspaper and drink our coffee. We leave for work and we sit in our cars or public transit each way. Once we get to work, most of us sit at a desk for hours at a time, sit to eat our lunches, and then return to work to sit for several more hours. We arrive home to sit and eat our dinner. Following dinner, we either get back on the computer or just watch TV until time to go to sleep. On any given day we could sit for 13-14 hours out of the 24 hours we are given.

    According a British Medical Journal study, if you sit for less than 3 hours per day, you could extend your lifespan by up to 2 years. Our health is clearly affected by the number of hours we sit and that could drive up our healthcare costs. The obvious problems are obesity, weakness of muscles, and nerve impingement. The not so obvious are less blood flow, joint stiffness, back pain, neck pain, lower oxygen intake, and problems with your digestive system. Sitting compresses the spine. Even if your office is ergonomically correct, you can still suffer from chronic illnesses.

    Check Out: British Medical Journal study; Stand Up for Health.

    In the seated position, your torso is compressed causing pressure on your digestive system making it difficult to digest your food properly and intestines to work properly. This can lead to indigestion and bladder pain. Your chest will typically round in as we work on computers to write on the desk. This will reduce your ability to fully expand your lungs. Over time, your body will maintain this position even when standing and your stamina will suffer. Your head will lean forward putting pressure in the mid back increasing your risk of headaches and even ringing in your ears. Finally sitting can shorten the front of your thighs, quads, and increase your risk of low back pain or even knee pain.

    Check Out: Here’s What Sitting too Long does to your Body

    How can you reverse the risks? Obviously, stand up more any time you can. When on the phone, stand up and talk. If you are in a meeting, if possible stand up. When going to lunch, walk instead of riding, if possible. When you do have to sit, be conscious of how you sit. Keep your back straight and don’t slouch in the chair. Make sure your feet can touch the floor and pull your chair closer to your desk, so your body will be straighter.

    Finally, learn how to stretch your body to reverse the posture you have held all day. While sitting at your desk, start by stretching your neck up. Place both hands under your chin and look up. Give yourself a nice little stretch for 2 seconds and release. Repeat the stretch 10 times and do them 3 times per day. Use a door way and stretch your chest to take the pressure off your mid back. Remember to hold the stretch for 2 seconds and repeat 10 times. In the evening you can stretch out your upper quads, the front of your thighs, to take pressure off your low back. This stretch can be done by lying on the floor or your bed. Lay on your side and pull your lower knee up toward your chest. Grab the ankle of the upper leg and pull your heel back to your hip. You should be able to touch your hip. If not, practice this until you can. Hold for 2 seconds and repeat 10 times. Lastly, with the heel of your upper leg against your hip, kick your knee back and you will feel the stretch in the upper thigh. Hold 2 seconds and repeat 10 times.

    Check Out: 7 Simple Exercises That Undo the Damage of Sitting

    Doing these few things can help relieve your common aches and pains from sitting and allow you to do the activities you enjoy most. I would suggest you do the neck and chest stretches daily. Do the thigh stretches every other day. It may take a little time now, but it can save you a lot of pain later.

    Check Out: Safe Lifting & Carrying Training

    5 Tips to Getting Companies “invested” into True Ergonomics

    1. Focus on productivity, health, safety and prevention instead of lagging indicators such as injury rates. Reaction to injury leads to poor choices that get rationalized as sensible, but show little benefit. Providing hearing protection only for workers whose hearing is already damaged would seem like foolishness to most of us. Yet it is actually the policy of most companies to consider alternative computer keyboards only for injured workers. This is like closing the barn doors after the horses have run away. Encourage your employer to be proactive about prevention. (You could suggest that your managers read this article.)
    2. Insurance companies who write coverage for Worker’s Compensation need to become proactive in establishing incentives for companies who will invest, not just in any product that says it is ergonomic, but in products that can be demonstrated in scientifically sound studies to show promise, and in paying for independent ergonomists (those who don’t sell the ergonomic products they recommend) to help make sound decisions. It takes a small leap of faith, but any insurer who does this will be at a competitive advantage in the years to come by having a lower claims rate and offering lower premiums.
    3. Standards need to be established. Many ‘ergonomic’ products are designed by marketing or manufacturing people with no clear understanding of the ergonomic problems that need to be solved. New initiatives like the ErgonomicStar™ program, and other evaluation procedures or rating systems need to be developed as buyers’ guides so money isn’t wasted on products that don’t accomplish the buyer’s purpose.
    4. Don’t waste energy on government regulation. Even if the OSHA standards put in place at the end of the Clinton administration had remained, there would not have been sufficient funding to ensure across-the-board compliance. Why start over on a losing proposition? There are very real and tangible benefits over the long run to implementing sound ergonomic choices. If government offices at all levels would invest in the best ergonomic consultants and equipment currently available, it would stimulate the economy and protect a large body of workers all at the same time. The best role of government is to set an example rather than create regulation.
    5. Look for the obvious targets of opportunity within your own company. Computer workstations are certainly not the only only area of concern regarding ergonomics. They do present an easy opportunity in many companies to make a lot of difference, however. Every manufacturing environment can present different challenges. Every computer workstation shares a large number of similarities with most others. Identify those types of opportunities within your business and suggest a task force be formed in the interest of greater productivity, as well as better health and safety.

    View & download the Ergonomics Training below:

  • Accident Investigation Training- Intermediate

    Accident Investigation Training- Intermediate

    As you advance your team in a quality accident investigation program, it is imperative to continue their training to improve their skills.

    This accident investigation training is for intermediate level, so it is best recommended to start with the beginner’s training.

    5 Step Investigative Process

    • Response
    • Fact Finding
    • Analysis
    • Corrective Action
    • Follow-up

    The investigation process explained

    This training teaches the 5 steps of a quality accident investigation process, which goes beyond the initial investigation, but rather includes all steps and stresses importance of correcting hazards.

    We provide a beneficial training on root cause analysis, that will assist in the job skills needed for a high quality accident investigation. A quick root cause is imperative during the Response phase of an investigation, so all potential evidence and witnesses can be identified for a thorough investigation.

    During the Fact Finding phase of the investigation, you’ll continue to work towards an in-depth root cause. At this stage, it is recommended to use a root cause worksheet.

    During the Analysis phase of an investigation, this is when it is best to complete the Accident Analysis Report, which includes a full root cause worksheet. This analysis is a complete summary of all aspects of your investigation, including a full review of all written statements.

    The Corrective Action phase of an investigation is valuable to negate the hazard to ensure no one else is injured. This improves workplace safety, and ensures the workplace remains compliant to the OSHA General Duty Clause. I also offer a corrective action template, which is beneficial not just for assigning corrective actions, but also for quality follow-up, the final phase of the investigation process.

    Check Out: Budgeting for Training

    Other resources for safety investigations:


    This training is best conducted in a classroom presentation environment, but can also be done a part of a self-learning exercise. The most important aspect is that this training is a part of a continuing improvement of a workplace accident investigation program.

    Download and view the Intermediate Accident Investigation Training below


  • Spill Response Plan – Training

    Spill Response Plan – Training

    Developing an effective Spill Response Plan involves a lot of planning and thinking ahead to manage the worst type of spill that could happen. Take it step by step and decide how to handle each problem. Then obtain the necessary supplies and train all employees in their use. Last, anticipate and plan for a disastrous spill or an event that would trigger the 911 call. Train all employees thoroughly.

    Developing A Spill Response Plan

    An effective Spill Response Plan requires:

    • A complete evaluation of the work site.
    • Make an emergency evacuation plan for the area, work site, or building.
    • List the chemicals that are stored on-site, as well as their amounts.
    • Determine what constitutes a small spill that can be safely controlled and cleaned up by on-site personnel.
    • Decide what is a ‘large spill’.
    • Decide what will trigger a 911 call or one for the Emergency Response Team or HAZMAT Team.
    • Plan the most effective way to handle any spill that might occur.
    • Develop a recommended Spill Response for each chemical that is on-site.
    • Determine the amount of Spill Kits and containment supplies that will be needed and have them on-site, near the chemical storage area.
    • Determine what Personal Protective Equipment (PPE) will be needed to manage a spill of each chemical.
    • Be sure there is an adequate amount off PPE on hand.
    • Train all workers in the proper use of PPE.
    • Be sure that there are adequate numbers of fire extinguishers on-hand and employees know how to use them.
    • Make a list of emergency phone numbers and post several in highly visible places.
    • Make a list which contains the phone numbers of individuals that are to be contacted in the event of a spill.This should be kept in an area that is easily accessed by all personnel.
    • If different chemicals are added to the on-site inventory, the amount or type of spill containment supplies may need to be increased.
    • Employees and contractors who come on site must all be trained in the Spill Response Plan and how to use spill containment supplies such as drain plugs, dikes and socks to help avoid a release of the spilled chemicals into the environment.
    • Determine reporting requirements to federal, state and local agencies.
    • Designate personnel or a manager to handle this task. Necessary reporting forms should be available on-site.
    • Obtain SDS sheets for all chemicals on site.
    • Have SDS sheets readily available for employee use; this can be in a binder or electronically, as long as employee’s know how to access them when needed.
    Check Out: How to Read an SDS Sheet

    Employee Training for Spill Response

    All employees and on-site contractors must be trained in:

    • Neutralizing and controlling chemical spills
    • Cleaning up hazardous wastes
    • How to use PPE
    • How to use a fire extinguisher
    • Basic First Aid
    • Management of used personal protective equipment (PPE)
    • Disposal of clean up materials
    • Disposal of hazardous waste
    • Handling the reporting requirements of state, federal and local agencies
    • Understanding the use of SDS Information Sheets
    • Understanding how to access SDS sheets in the company’s method of choice
    Check Out: Budgeting for Training

    Employees should be involved in the development of the Spill Response Plan and be able to recognize a spill that requires a 911 call. They should know the location of spill control supplies as well as spill kits. For the safety of all, every employee and contractor must be well trained and understand the Plan well.

    The below training can be given in a classroom presentation, or as part of a self-learning style. Just ensure your company has a subject matter expert to answer questions.

    Download & view the Spill Response Training below:


  • Emergency Response Plan Explained – Training

    Emergency Response Plan Explained – Training

    Knowing how to handle an emergency in the workplace is important for optimal employee safety, for many workplaces it is also an OSHA requirement under CFR 29.1910.38.

    As part of a quality emergency response plan, you need to train your employees on the basics of the plan and the basics of safe evacuation.

    This training Emergency Response Plan Explained is a template for your company to provide this training. This can be administered in a classroom training or as part of a self learning exercise.


    OSHA specifically spells out the training requirements for emergency action plans for all employees:

    1910.38(f)

    Review of emergency action plan. An employer must review the emergency action plan with each employee covered by the plan:

    1910.38(f)(1)

    When the plan is developed or the employee is assigned initially to a job;

    1910.38(f)(2)

    When the employee’s responsibilities under the plan change; and

    1910.38(f)(3)

    When the plan is changed.

    Source

    Be aware that this does not meet every training requirement under the plan, and no training will, as OSHA has one other training requirement:

    1910.38(e)

    Training. An employer must designate and train employees to assist in a safe and orderly evacuation of other employees.

    Source

    This is a simple training that you can do in-house, by explaining and practicing evacuations with anyone identified in your emergency action plan as assisting with evacuation.

    Check Out: How to Put Together a Workplace Safety Training Workshop
    Use this training in conjunction with an emergency action plan template from here.

    Why training is an important part of an emergency response program

    Training Improves Responder Knowledge and Confidence
    This emergency action plan training ppt teaches employees what is expected of them in an emergency. Conducting practice evacuation drills trains responders to be able to respond to workplace emergencies quickly and competently, training empowers emergency responders to meet dangerous challenges with greater confidence. When responders have received proper emergency response training, they feel more confident and assured of their capabilities and roles.

    Quality Training Helps Responders Follow Emergency Plans
    Emergency plans are designed to reduce workplace injuries and fatalities, reduce damage to buildings, property and the environment, and help to resume work activities as quickly as possible.

    Download & View the Emergency Action Plan training below

  • PPE Selection Training

    PPE Selection Training

    Many know about PPE, or Personal Protective Equipment but don’t know why it’s so important in the workplace. This gear, including respiratory protective equipment among others shouldn’t be optional. According to recent studies PPE is the number one defense against safety and health risks at work.

    Types of PPE

    There are many types of PPE that can lend to workplace safety. They include:

    • Safety boots and other footwear
    • Helmets
    • Goggles and eye protection
    • High-visibility clothing
    • Safety harnesses
    • RPE – Respiratory Protective Equipment

    Industries in Need

    PPE is used in a wide range of industries and specific jobs. Building, healthcare, catering, agricultural and even lifeguards use PPE often. Which types are used depends wholly on the work environment and the various regulations set forth. Industries such as building, agricultural, medical, catering and even lifeguarding use respiratory protective equipment on a daily basis in some cases. The type of PPE changes according to the user’s working conditions and regulations, including those put in place by organizations like OSHA.

    Why is PPE important?

    Wearing PPE encourages workers to stay safe. However, even when applied measures exist, hazards still happen in work settings. The main function of PPE is to reduce injuries to lungs by using respiratory protective equipment, to the head and feet with helmets and proper footwear, to the skin via proper clothing, and the eyes by providing goggles or protective eyewear.

    For more information on Personal Protection Equipment, check out what else I have here

    Information on the Types of PPE

    Being educated more deeply on the types of PPE and how they work for the individual is proven to make them more appealing and encourage workers to actually put them on.

    Eyewear

    Protect the eyes from metal and chemical splashes, gas, dust, radiation and vapors. The choice of protection for the eyes should be in accordance with the requirements of the task at hand. They should also fit perfectly in order to keep the eyes safe. Some common types of eyewear for safety are:

    • Spectacles
    • Goggles
    • Face shields and screens
    • Visors

    Ears

    Many don’t even think of the ears when it comes to protection, but loud noises can do irreversible damage to the ear drums. Therefore earmuffs, plugs and other “caps” are important for certain work environments.

    Check Out: Budgeting for Training

    Head and Neck Protection

    The human neck and head need PPE in order to shield them from falling or flying objects, as well as keeping them safe from dangerous machinery that could easily kill them if they get tangled up in or fall into it. It also works with the eyewear to protect from chemical splashes. The following items should all be handy and checked regularly for damage, then replaced or repaired as necessary.

    • Helmets
    • Bump caps
    • Hairnets
    • Scarves

    Hand and Arm PPE

    Extremely high and low temperatures, abrasions, impact, lengthy water exposure, chemicals and electricity are all things that arms, and hands need to be protected from. There are various types of gloves and sleeves that can be worn to keep them safe in risky conditions.

    Feet and legs

    There’s no substitute for strong work boots or shoes that have metal toecaps for protection. They easily resist penetration. Wellies, or rain boots are another type of foot gear that are used for safety in very wet environments. Once risk is assessed in a workplace, the proper footwear can be determined.

    Lungs

    Respiratory protective equipment is necessary to protect the lungs. Any work environment that has airborne particles of any kind can be a risk to the lungs.

    These items along with those that protect the entire body head to toe like hazmat suits or clothing with high visibility, and flame-resistant wear are all part of the PPE that should be considered in the workplace.

    The below training is for safety professionals, to learn how to select the best PPE for their workplace.

    Download the PPE Selection Training below:

    View the PPE Selection Training below:

  • Slip, Trip, and Fall Training

    Slip, Trip, and Fall Training

    Certain universal truths in the safety world remain; one of which is that slips and trips tend to be one of the largest causes of accidents in the modern workplace leading to lost time and in some cases broken bones or worse.

    Whilst some injuries by their very nature will be more prone to slips and trips – catering, construction, agriculture – slips and trips can occur in the most benign working environments if adequate care is not taken to prevent them.

    The simple truth is modern safety has a common methodology no matter what the nature of the hazards involved are; if we follow that path then we can most effectively manage the risks from slips and trips.

    Step 1: Identify the Hazards and Undertake Risk Assessments

    Undertaking risk assessments on your workplace and the activities you undertake is the key step. A risk assessment merely looks at the possibility of harm occurring; in this case from slips and trips; and attempts to give the danger a value. This in turn allows you to identify where you can improve safety and help prevent accidents going forward.

    The hazard here is slips and trips; they can be caused by:

    • Poor working environments – inadequate lighting, uneven working surfaces, mud in outdoor environments, steps/stairs, poor flooring, badly positioned cables, poor housekeeping etc.
    • The people involved – unlikely to be a major issue in most workplaces – however you should consider visitors or customers and remember they have not the training your staff may have – plus especially in retail environments it may include more vulnerable groups. Pregnant staff should also be considered – later stages of pregnancy can leave a person more vulnerable to slips and trips and the consequences can be more severe.
    • The Work – the more people carry loads, especially large or bulky loads that obscure their vision; the more likely slips and trips are. Equally distracted people don’t pay attention to their surroundings so poor housekeeping combined with a busy workplace can lead to many accidents.

    Examine the workplace properly and make sure that whilst carrying out risk assessments you fully consider the risks from slips and trips taking into account the factors above. Make sure you look at what’s done correctly – not just the areas of concern and record those risk assessments.

    This should allow you to write down existing controls; eg: adequate storage, level flooring, well lit workplaces, good levels of housekeeping – the controls may also include practices such as supervisor safety walk rounds.

    It is useful to look at past accidents to see where most accidents occur – also remember a trip in a carpeted corridor is generally less severe than a slip near a staircase or workshop (equipment, supplies etc. can be sharp and dangerous to fall into).

    Need more components of a Slip, Trip, and Fall Program? Check out my Walking and Working Surfaces Basics Book on Amazon

    Step 2: Identify Improvements:

    Within the risk assessment process it’s essential you identify ways of reducing accidents with regards to slips and trips – now the possible list is endless but typical examples may include:

    Poor Housekeeping:

    • More or better storage
    • Staff training and awareness
    • Better Supervision
    • Frequent safety inspections
    • More cleaning equipment

    Cables:

    Electric cables or air hoses are one of the most common causes of slips and trips in the workplace.

    Cables and hoses should never cross walkways or areas of people movements. This can be prevented by:

    • Ensuring that all work areas have adequate power points to reduce the need for extension leads and trailing cables
    • In industrial settings look at “pods” that drop down to the work area keeping power and air supplies away from the floor so far as practical

    Spills:

    • Better spill prevention – some processes and work activities have equipment designed to reduce spills in the workplace.
    • Good procedures
    • Access to cleaning equipment, warning signs
    • Suitable floors if spills cannot be eliminated – eg: kitchens

    Carrying:

    • Can the manual handling be removed or replaced by equipment – especially over uneven surfaces or where things need to be carried up stairs or ladders.

    Poor Repair:

    Worn and frayed carpets, poorly maintained floors or unsuitable surfaces (high polish surfaces near entrances where rain can lead to slips and trips) are common causes of accidents – the more people, the greater the age range, the greater exposure of the public all affect the risks here.

    Suitable Footwear:

    Industrial mesh floors are very good at preventing slips – providing you’re wearing industrial footwear – they can be highly hazardous to heels. Equally whilst walkways can be built around construction sites there will always be wet and muddy areas – suitable safety boots help reduce the number and severity of accidents. Remember boots with ankle support not only help reduce slips but also minimise the risk of ankle injuries.

    Step 3: Undertake Improvements:

    Ensure you make the physical improvements in terms of better lighting, new carpet, floor repairs and changes to work activities where possible in light of your risk assessments.

    Ensure that where greater staff training will help reduce the risks through awareness or where supervisors should be more proactive make sure the training or awareness raising is undertaken and recorded.

    Step 4: Inspections:

    Housekeeping and general repair of the workplace should be checked regularly. This should involve frequent walk rounds by managers and supervisors of their area – this should be done on an on-going basis throughout the working day.

    In addition formal inspections should be undertaken weekly – these should be recorded.

    Want to improve your workplace safety around Slips, Trips, and Falls? Consider doing a Walking and Working Surface Audit

    Step 5: Review Accident Records:

    Look at where issues remain and re assess those areas – are the controls working, is the issue one where new controls are required or are the accidents occurring because housekeeping and supervision remain poor?

    Accident records should show not just broad trends but repeated slips and trips in an area will tell you where to re assess and look again at the safety measures in place.

    Members view the Slip, Trip, and Fall Training below:


  • Safe Lifting and Carrying Training

    Safe Lifting and Carrying Training

    Proper methods of lifting and handling protect against injury.  Proper lifting makes work easier.  You need to “think” about what you are going to do before bending to pick up an object.  Over time, safe lifting technique should become a habit.


    Following are the basic steps of safe lifting and handling:

    1. Size up the load and check overall conditions. Don’t attempt the lift by yourself if the load appears to be too heavy or awkward.  Check that there is enough space for movement, and that they footing is good.  “Good housekeeping” ensures that you won’t trip or stumble over an obstacle.
    2. Make certain that your balance is good. Feet should be shoulder width apart, with one foot beside the other and the other foot behind the object that is to be lifted.
    3. Bend (the knees; don’t stoop). Keep the back straight, but not vertical.  (There is a difference.  Tucking in the chin straightens the back).
    4. Grip the load with the palms of your hands and your fingers. The palm grip is much more secure.  Tuck in the chin again to make certain your back is straight before starting to lift.
    5. Use your body weight to start the load moving, and then lift by pushing up with the legs.

    This makes full use of the strongest set of muscles.

    1. Keep the arms and elbows close to the body while lifting.
    2. Carry the load close to the body. Don’t twist your body while carrying the load.  To change direction, shift your foot position and turn your whole body.
    3. Watch where you are going!
    4. To lower the object, bend the knees. Don’t stoop.  To deposit the load on a bench or shelf, place it on the edge and push it into position.  Make sure your hands and feet are clear when placing the load.


    Make it a habit to follow the above steps when lifting anything-even a relatively light object.


    Team lifting must be coordinated


    • If the weight, shape, or size of an object makes the job too much for one person, ask for help.
    • Ideally, workers should be of approximately the same size for team lifting.
    • One individual needs to be responsible for control of the action to ensure proper coordination. If one worker lifts too soon, shifts the load, or lowers it improperly, either they or the person working with them may be injured.
    • Walk out of step


     Check Out: 10 Safety Tips at Work


    Lifting heavy objects

    • Safe lifting of heavy items requires training and practice. For example, we’ve probably all seen a small person move heavy feed sacks with apparent ease.
    • The secret lies in taking the proper stance and grip
    • When equipment is available, it should be used to lift and carry heavy objects.
    • Loaders, forklifts, hoists, etc. are made for this purpose.

    “Do’s” and “Don’ts” of Safe Lifting and Carrying


    Do

    • Tuck in the chin to keep the back as straight as possible while lifting.
    • Lift with the strong leg muscles.
    • Ask for help with the heavy, awkward items.
    • When possible, use mechanical equipment to move heavy items.
    Don’t

    • Use your back muscles to do lifting.
    • Try to lift an item that is too heavy or awkward.
    • Twist your body while carrying an object.
    • Attempt team lifting without proper coordination.


    Safe Manual Lifting and Carrying Overview


    Steps Techniques
    Planning

    •      Size up the load and check overall conditions

    •      Check route for clearances and obstacles

    •      Use a handcart or dollie, etc. when possible

    •      Break down large and heavy loads

    •      Know your limits

    •      Seek help if necessary

    •      Take extra care with awkward tasks


    Lifting


    Remember to use the “5” L’s of Back Safety

    •      Load

    •      Lungs

    •      Lever

    •      Legs

    •      Lordosis – keep your back straight


    Carrying


    •      Hold the load close to your body

    •      Look where you are walking

    •      Take extra care carrying up and down stairs

    •      Don’t twist your body, move your feet to turn


    Lowering


    •      Bend your knees to lower the load

    •      Don’t trap your fingers and toes

    •      Pull it down first, then slide it into place

    •      Don’t over-reach or stretch


    Download the Manual Material Handling Training below:

    View the Manual Material Handling training below


  • Forklift Safety Training

    Forklift Safety Training

    Following proper forklift safety guidelines will lower your chances of getting in a serious accident and either getting seriously injured or causing damage. Forklifts are some of the most useful machines in the workplace and without them basic workplace activities would be much more difficult. Respect their power and make sure that forklift safety is a priority in your workplace.

    The training here is to be presented by a competent person in a classroom environment, allowing for discussion of site specific issues. Without discussing site specific safety issues, the training is incomplete, as operators won’t know what hazards they face in the workplace.

    Besides this training presentation, there is more needed for qualified operators in your facility.

    Make sure your operators are also given an evaluation by the competent person as part of your company’s training program.

    These evaluations should be completed on a form and kept as part of the training record. It is equally important to keep all failed evaluations, and retraining evaluations after an incident, as these provide proper documentation in the event of a regulatory investigation.

    Why Forklift Operator Training Matters:

    • Forklifts can be very dangerous—in an average year, 100 people die in forklift-related accidents, and 20,000 are seriously injured in forklift mishaps, resulting in lost workdays.
    • Common forklift-related injuries could result from:
      • Hitting a pedestrian with a forklift,
      • Forklift tipover,
      • Improperly positioned loads,
      • Falling from the forks or from a platform positioned on the forks,
      • Falling from a ladder that is struck by a forklift, and
      • Being struck by materials that fall from a forklift.

    When training and evaluating operators on forklifts, make sure you’re training employees appropriately for the equipment involved, each type of piece of powered equipment. So, it is important to know what equipment is used in the workplace.

    OSHA divides Forklifts into five classes:

    • Class One forklifts are powered by electric motors and are generally used inside because of their lack of exhaust fumes.
    • Class Two forklifts are used in narrow aisles for order picking by the forklift itself or by the driver who is raised up.
    • Class Three forklifts have operators who either walk behind or lead the lift. They aren’t actually driven but operators still need to achieve certification.
    • Class Four forklifts are operated by fuel and have solid rubber tires that can only be used on paved surfaces.
    • Class Five forklifts are also operated by fuel, but they have pneumatic tires which allow them to be driven on unpaved roads.

    Whatever class of forklift you operate, OSHA requires training specific to that forklift. Forklifts are powerful and indispensable vehicles that make our lives easier. The power of these machines also makes them extremely dangerous. As such, the training required is imperative.

    Looking to learn more about powered equipment safety? Check out the Powered Equipment Inspection Books I have published on Amazon, or any of my other posts on powered equipment safety

    Here are some safety tips about driving forklifts.

    • Before you drive off make sure that you adjust your seatbelt and buckle up, just like a car.
    • Make sure that you keep the forks low – four to six inches off of the floor. Raised forks damage equipment and insure people.
    • Maintain a speed that will allow you to stop quickly and control your load. A sudden stop can cause a jolt and you could lose your load.
    • Always drive to the right of other vehicles and pedestrians just like you would in a car.
    • Always stop and sound your horn at every corner and doorway – other drivers and pedestrians may not be paying attention. Look both ways before you continue.
    • If you have a load that impairs your vision, then drive backwards and use a co-worker to help you see.
    • Look for hazards before you drive. Know all the problems areas before you lift. Ducts and overhead pipes can be lower than you think and significant damage could occur.
    • If you need to leave the vehicle always put the engine in neutral, set your parking brake and lower the mast to the floor. If you are a slope, block the wheels. All of this will ensure the forklift will not move while you are gone.
    • Manual Handling guidance is easy to provide, however making sure it is used is easier said than done.
    • The regulations state that handling should be eliminated if at all possible. Despite having more labor saving devices than ever before, lifting and moving items is still required and therefore removing the need is not always possible. Even if you outsource your handling requirements, you still retain some responsibility for ensuring the organization moving the equipment has appropriate risk assessments and trained staff in place.
    Check Out: 10 Reasons Why Safety Training is Often Ineffective

    View and Download the Operator Evaluation Form


    Properly filling out this form and conducting an evaluation, will ensure employees properly operate equipment in a safe manner.

    A great way to conduct an evaluation is to set up a course, away from pedestrians, and other critical items. This ensures that hazards are minimized while a new operator is first learning.

    The evaluation portion of the training should include test operations, such as driving with unstable loads, driving in


    Download and View the Forklift Safety Training below


  • Loading Dock Safety Training

    Loading Dock Safety Training

    The loading dock in a business is a high hazard area, with many different risks. With freight and powered equipment moving through the area, injuries can be significant, an easy way to reduce risk of injury is by providing employees with this loading dock safety training.

    Loading dock injuries reviewed

    • Every 3 days someone is killed in a forklift related accident at a loading dock.
    • An additional 94,750 forklift related injuries are reported each year.
    • $135,000,000 in immediate costs are incurred due to forklift accidents.
    • 7% of forklift accidents occur when a lift truck is driven off a loading dock.
    • 12% of all loading dock fatalities involving power equipment result from trailer/dock separation.
    • 70% of all reported accidents could have been avoided with proper safety precautions
      *nist.gov, “Performance Metrics for Intelligence Systems Workshop” 2009

    Training employees to identify the hazards in a loading dock area, examples include:

    • Inspecting loads received to make sure they are stable and undamaged
    • Destroying damaged pallets
    • Inspecting loads before movement to ensure proper shrink-wrapping or banding
    • Securing dockplates or bridges
    • Chocking trailer wheels before accessing a trailer
    • Engaging locking devices before entering trailers
    • Guarding dock edges when trailers are absent

    This loading dock training will provide employees with the proper knowledge to identify risks and also the foundations of a quality loading dock safety program.

    Requirements and Recommended Practices:

    • Maintain a safe distance from the edge of loading dock.
    • Watch out for tail swing.
    • Keep working surfaces clear and clean.
    • Paint the edges of the loading dock to improve visibility.

    From OSHA.gov

    Do you have other Loading Dock Safety needs? I offer the following:

    This safety training can be conducted in a classroom training environment or as part of a quality self learning training program.

    Download the Loading Dock Safety Training below

    View the Loading Dock Safety Training below