Author: Kevin Schmidt

  • Business Continuity Forms

    Business Continuity Forms

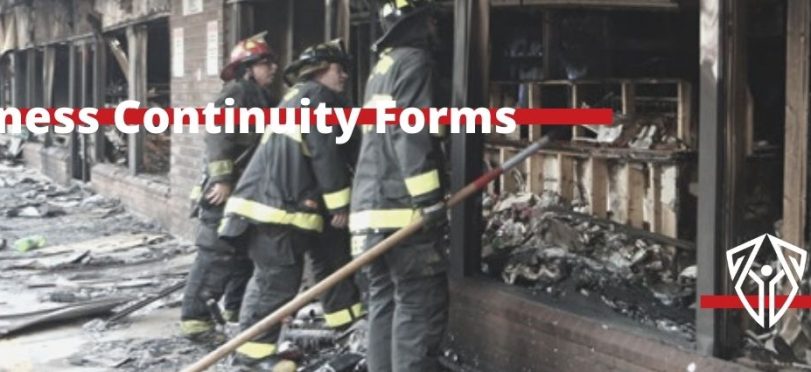
    A quality business continuity plan has many aspects to it. The forms included in this post will help build your entire form.

    Does your company have a business continuity plan? Check here

    If not, read this whitepaper on the importance of a business continuity plan from FEMA.

    Forms for a quality business continuity plan

    • Business Program Committee Worksheet: This form identifies all members of the business continuity team, with their contact information, along with all relevant numbers for other outside organizations and agencies. Using these pages at the front of your business continuity book will assist you when the plan is needed.
    • Business Insurance Discussion Form: This form is used as part of the business continuity plan, to ensure your company has all the important insurance coverage, and all important aspects of your insurance.
    • Business Emergency Response Resources Form: This form is a full review of your entire business continuity plan, this form includes costs associated with each aspect. An important aspect of this form is the “response time” column, is for how long will it take this component to be enacted. This is important, because every event requires different response levels, and how quickly things need to be implemented.
    • Business Emergency Supplies List: This list are things you should have in a well stocked emergency response kit. These supplies are great for planning for natural disasters or other disasters that regularly hit an area.
    • Business Computer Inventory Form: This form is an asset list of all computer equipment owned by your company. This form is great for ensuring all equipment, across multiple job locations are accounted for, and any costs associated for insurance.
    • Business Cost Form: When reviewing your business, knowing how to account for all associated costs of a disaster plan, will help shape your plan, and all budgeting required to respond properly.


    These forms will build your quality plan, and will assist you in responding properly to every potential business disruption.

    Also, make sure to check out the Business Impact Analysis Worksheet, here, to ensure your plan is thorough for all needs.


    View and download the Business Continuity Forms below

    Business Program Committee Worksheet


    Business Insurance Discussion Form


    Business Emergency Response Resources Form


    Business Emergency Supplies List


    Business Computer Inventory Form


    Business Cost Form


  • Business Impact Analysis Worksheet

    Business Impact Analysis Worksheet

    As part of the business continuity planning session is to identify what items need to be a part of the plan, this is done through a risk assessment. Next step is to determine whether they will impact your business financially, operationally, or both. This worksheet will assist you in determining that, along with any interconnected elements.


    This Business Impact Analysis Worksheet is an integral part of a quality business continuity plan.

    How to conduct the Business Impact Analysis successfully

    • Gather senior leadership from all departments of the company to provide insight.
    • Review all potential scenarios seriously, no concept is ridiculous, as they can damage your business.
    • Don’t build an analysis that contains an overabundance of information, keep it lean and direct. What information is directly related to that section?
    • Review the results of the impact with all departments, and review the assessment on a minimum annually.

    Possible Loss Scenarios

    What are the possible loss scenarios that businesses are faced with, and have the potential of disrupting or interrupting operations? Performing risk assessment will help a company identify its possible loss scenarios. Some of the most common ones that are found across businesses and industries are listed below.

    • Accidents: All too often, businesses suffer from losses due to workplace accidents. For example, fire at the factory where the critical operations of the business are performed can cause closure. A burst pipe in the water supply may also incapacitate the work area for quite some time. The machines being used may malfunction and shut down, unable to work unless it undergoes major repair or is replaced with a new one.
    • Emergencies: These are unexpected situations that pose considerable danger, thereby calling for immediate action. The immediate action, in this case, is often the stoppage of business operations. Political and civil unrest, for example, may involve riots on the streets and other similar acts of violence. Usually, these will drive businesses to close their doors and stop operating until things have settled down. Although these are not strictly dangerous or perilous, they also count as emergencies that will result to interruption of operations. Examples are:
      • Failure of suppliers to deliver raw materials and other goods and services needed on time;
      • Failure of suppliers to deliver raw materials and other goods and services needed altogether;
      • Labor disputes within the company leading to workers refusing to continue working until their demands have been heard and met by management;
      • Utility failures, such as water shortage and shortage of power supply;
      • Cyber attacks, when the company’s information system is under threat by external forces; and
      • Absenteeism of key employees may also give rise to emergencies.
    • Disasters: These could be natural disasters (force majeure) or man-made disasters. Examples are earthquakes, strong typhoons/hurricanes, large-scale bush fires, massive power outages or shutdowns, and volcanic operations. These may result to physical damage to properties, specifically those that are used in the operations.

    Do not just assume these are the only incidents that can effect your organization, this is just the list of common incidents that can effect all industries, across all business divisions.


    View & Download the Business Impact Analysis Worksheet below

  • Safe Lifting and Carrying Training

    Safe Lifting and Carrying Training

    Proper methods of lifting and handling protect against injury.  Proper lifting makes work easier.  You need to “think” about what you are going to do before bending to pick up an object.  Over time, safe lifting technique should become a habit.


    Following are the basic steps of safe lifting and handling:

    1. Size up the load and check overall conditions. Don’t attempt the lift by yourself if the load appears to be too heavy or awkward.  Check that there is enough space for movement, and that they footing is good.  “Good housekeeping” ensures that you won’t trip or stumble over an obstacle.
    2. Make certain that your balance is good. Feet should be shoulder width apart, with one foot beside the other and the other foot behind the object that is to be lifted.
    3. Bend (the knees; don’t stoop). Keep the back straight, but not vertical.  (There is a difference.  Tucking in the chin straightens the back).
    4. Grip the load with the palms of your hands and your fingers. The palm grip is much more secure.  Tuck in the chin again to make certain your back is straight before starting to lift.
    5. Use your body weight to start the load moving, and then lift by pushing up with the legs.

    This makes full use of the strongest set of muscles.

    1. Keep the arms and elbows close to the body while lifting.
    2. Carry the load close to the body. Don’t twist your body while carrying the load.  To change direction, shift your foot position and turn your whole body.
    3. Watch where you are going!
    4. To lower the object, bend the knees. Don’t stoop.  To deposit the load on a bench or shelf, place it on the edge and push it into position.  Make sure your hands and feet are clear when placing the load.


    Make it a habit to follow the above steps when lifting anything-even a relatively light object.


    Team lifting must be coordinated


    • If the weight, shape, or size of an object makes the job too much for one person, ask for help.
    • Ideally, workers should be of approximately the same size for team lifting.
    • One individual needs to be responsible for control of the action to ensure proper coordination. If one worker lifts too soon, shifts the load, or lowers it improperly, either they or the person working with them may be injured.
    • Walk out of step


     Check Out: 10 Safety Tips at Work


    Lifting heavy objects

    • Safe lifting of heavy items requires training and practice. For example, we’ve probably all seen a small person move heavy feed sacks with apparent ease.
    • The secret lies in taking the proper stance and grip
    • When equipment is available, it should be used to lift and carry heavy objects.
    • Loaders, forklifts, hoists, etc. are made for this purpose.

    “Do’s” and “Don’ts” of Safe Lifting and Carrying


    Do

    • Tuck in the chin to keep the back as straight as possible while lifting.
    • Lift with the strong leg muscles.
    • Ask for help with the heavy, awkward items.
    • When possible, use mechanical equipment to move heavy items.
    Don’t

    • Use your back muscles to do lifting.
    • Try to lift an item that is too heavy or awkward.
    • Twist your body while carrying an object.
    • Attempt team lifting without proper coordination.


    Safe Manual Lifting and Carrying Overview


    Steps Techniques
    Planning

    •      Size up the load and check overall conditions

    •      Check route for clearances and obstacles

    •      Use a handcart or dollie, etc. when possible

    •      Break down large and heavy loads

    •      Know your limits

    •      Seek help if necessary

    •      Take extra care with awkward tasks


    Lifting


    Remember to use the “5” L’s of Back Safety

    •      Load

    •      Lungs

    •      Lever

    •      Legs

    •      Lordosis – keep your back straight


    Carrying


    •      Hold the load close to your body

    •      Look where you are walking

    •      Take extra care carrying up and down stairs

    •      Don’t twist your body, move your feet to turn


    Lowering


    •      Bend your knees to lower the load

    •      Don’t trap your fingers and toes

    •      Pull it down first, then slide it into place

    •      Don’t over-reach or stretch


    Download the Manual Material Handling Training below:

    View the Manual Material Handling training below


  • Business Continuity Plan

    Business Continuity Plan

    Is your business prepared to handle an emergency? More importantly if your business experiences an emergency, are you prepared to continue operating? Without a business continuity plan, a natural disaster or other catastrophic event could not only impact your business when it happens, but could continue to impact your business as you scramble to get back up and running.

    Don’t lose your business simply because you failed to plan, instead have a plan, and hope you never need it.

    Here are 4 Misconceptions about a business continuity plan from Traveler’s Insurance

    Misconception #1: “Our people will know what to do in an emergency.”

    Even the best employees cannot be expected to know what to do when disaster strikes. Leaving each to respond in his or her own way only adds to the confusion of an event. Having a well-documented business continuity plan in advance, and training your employees to follow it, gets everyone on the same page — helping to ensure an organized, safe and timely recovery.

    Misconception #2: “We have insurance to cover our losses.”

    Insurance alone is NOT a business continuity strategy. Proper coverage is a significant and important part of the plan. But it may not fully cover some of the peripheral damages from an event, like loss of customers, loss of market share, or setbacks in development or release of a new product. Consult with your insurance agent to understand what is and is not covered under your policy.

    Misconception #3: “We do not have the time to develop a business continuity plan.”

    Time spent developing and maintaining a business continuity plan is an investment in your company. Your fixed costs will continue after an event, whether or not you are open for business. The faster you can return your operations to normal, the more likely you will recover from the event successfully. With so much at stake, your company cannot afford to NOT have a plan.

    Misconception #4: “Business continuity and disaster recovery planning are the same.”

    Business continuity is a proactive plan to avoid and mitigate risks associated with a disruption of operations. It details steps to be taken before, during and after an event to maintain the financial viability of an organization.

    Disaster recovery is a reactive plan for responding after an event. It deals with the safety and restoration of critical personnel, locations, and operational procedures after a disaster, and is a part of business continuity planning.

    Still unsure if your business needs a business continuity plan? Check out this white paper from The Insurance Institute of Business and Home Safety.

    Check Out: Emergency Action Plans

    Download and view the Business Continuity Plan

  • How to Introduce a Change to Your Safety Culture

    How to Introduce a Change to Your Safety Culture

    Before you can introduce a change to your safety culture you have to make sure that you know exactly what it is currently. Remember that a culture is built up over a period through behavior, anecdotes, stories, boundaries of behavior, way of doing things, events that pass without comment, events that cause problems and so on. It is a complex, multi-layered element in the workplace and the belief system about safety has had contributions from all these factors. It is not a single entity but rather a combination of many things that are all intertwined, they are not separate.

    The first thing you do is find out what your current safety culture represents, then you must look at what you want it to be in the future and design a plan to bridge the gap. The changes that you want to make may not be big changes but a series of small changes. If you find that there is a major change to be made, break it down into smaller elements. It is strongly advised that this planning exercise include the staff that are going to be affected.

    In the back of your mind the reasons why most people resist change in the workplace. People don’t like change because normally, they are not involved in it and the change is imposed on them. This lack of involvement is probably the greatest reason why people resent change and actively fight against it. When this happens, these people will perceive the consequences of the change to be negative and they will persuade anyone that will listen that the change is of no benefit to anyone.

    So, planning your change means that you must involve your people as well. And one of the ways of doing this is to get them to look at the current situation and take out the undesirable parts and recommend alternatives. Then you’re able to ask them to help design a vision for the future. If you can get their cooperation at this stage, you are well on the way to establishing a process of change that can be repeated in the future.

    Once the vision for the future has been established and discussed, you can then ask your staff about the process of bridging the gap and delegate some of the tasks. You will find that there will be a degree of enthusiasm for change when you follow this process and you will find that this enthusiasm is infectious.

    The actual changes themselves can be timetabled by the staff and progress can be discussed in group meetings as a form of feedback.

    Check Out: Safety Training Is About Behavior Change

    How Good Leadership Will Overcome Resistance to Change

    Firstly, we must understand that people in leadership positions are constantly dealing with change. Change is part of being a leader. Sometimes it is the design of change but more frequently it’s the implementation of change. Because of poor planning and a failure to sell the need for change, a myth of considerable proportions has developed in the business world. We are told that people naturally resist change. This has become a major concern for most businesses and many have invested millions learning how to “manage change.”

    We are continually bombarded with rhetoric about the urgency and acceleration of change in today’s “fast-paced business world.” The fact is people don’t resist change if the change provides immediate positive consequences for them. Properly presented change and immediate consequences that are both certain and positive is the recipe to ensure that change is readily accepted and supported.

    Think about it this way, nobody resists change when the immediate consequences favor it. “Do it this way, and you won’t hurt your fingers.” “Hold it this way, and you will be able to see it better.” “Move your right hand this way, and you will be able to hit the ball straight.” If the correct behavior follows these instructions, and positive consequences occur, you will not have a difficult time getting people to accept change in those situations.

    It is only in situations where the immediate consequences of change are punishing, or when the new behavior is not immediately reinforced, that you run into trouble. Often, we are so busy trying to cope with a new environment because of change that we forget to use positive reinforcement to cement it in.

    Regrettably, most organizations have a list of historical events where the implementation of change has failed. Because of this, subsequent and future changes are met with a less than enthusiastic approach by the people who are going to be affected by the change. They have learned that change has got unpleasant consequences. Our failure to take an intelligent approach to change has built an environment that actively resists change. The only way we can overcome this is to build trust and this can only occur if our words and actions match. Better leadership that creates an environment of trust will also create an organization that accepts change as part of business life.

    Almost every corporate initiative impacts the performer negatively at first. While the staff member may understand that there are long-term benefits to the company and to the individual personally, the immediate consequences of doing things differently are usually negative. New behaviors require extra effort to learn, result in increased mistakes, cause the performers to get behind in their other work, and create stress because people fear they won’t be able to learn or perform as well under new conditions.

    To make change a positive experience, we need to be less concerned with managing the change and become much more attentive to managing the consequences associated with change.

    How Leaders Use Persuasion to Introduce Change

    Introducing change is one of the primary functions of leadership, however, introducing change is a process that can be exceptionally difficult. Resistance to change tends to come from the leader. When change exposes individuals to failure and punishment, they resist. However, when change exposes the individual to positive reinforcement, they actively seek it out. Resistance to change is the indication to the leader that something is wrong with the methods being used to achieve change.

    Check Out: Successfully Persuade People That Workplace Injuries Are Preventable

    If, during the process of change positive reinforcement is not used or misdirected, resistance will be the result. Effective leaders use a variety of methods of persuasion to create the need for change. One of the most successful tactics is to take a process and ask the question, “Is there a better or smarter way of doing this job?” This question can be posed either to individuals or groups.

    Sometimes, it is posed slightly differently making the assumption that there is a better or smarter way. “What is the better or smarter way of doing this job?” When you ask this question you are not necessarily looking for an instant solution, you are provoking thought. Often you have to ask the question more than once and then when you have a selection of answers ask your team which is the most practical and potentially effective one. During the resulting discussion the solution may even undergo a process of refinement and improvement.

    Obviously the next question is, “Who is going to do it, how will they do it and when is it going to get done?” The element of persuasion which is being used by the leader is indirect. He or she may know the answers but will refrain from offering a solution. It is a deliberate attempt to involve the group in the solution and come up with ideas to make the job easier, safer, quicker or improve quality. If the leader has sufficient patience, the answers will come from the group. This has the added advantage that they will continue to think about the process even after the change has been installed.

    The alternative to this process is one of prescribing change and managing it closely to ensure compliance and implementation. By asking questions the leader has involved the group in the solutions as well as the process of change. This is a much more effective way of managing the process of change by using the group members to come up with solutions and be involved in the implementation. Although this will not completely eradicate resistance it will minimize the effect of it. After several changes have been installed the group will trust the process and accept it readily provided there is sufficient and frequent positive reinforcement.

  • Forklift Safety Training

    Forklift Safety Training

    Following proper forklift safety guidelines will lower your chances of getting in a serious accident and either getting seriously injured or causing damage. Forklifts are some of the most useful machines in the workplace and without them basic workplace activities would be much more difficult. Respect their power and make sure that forklift safety is a priority in your workplace.

    The training here is to be presented by a competent person in a classroom environment, allowing for discussion of site specific issues. Without discussing site specific safety issues, the training is incomplete, as operators won’t know what hazards they face in the workplace.

    Besides this training presentation, there is more needed for qualified operators in your facility.

    Make sure your operators are also given an evaluation by the competent person as part of your company’s training program.

    These evaluations should be completed on a form and kept as part of the training record. It is equally important to keep all failed evaluations, and retraining evaluations after an incident, as these provide proper documentation in the event of a regulatory investigation.

    Why Forklift Operator Training Matters:

    • Forklifts can be very dangerous—in an average year, 100 people die in forklift-related accidents, and 20,000 are seriously injured in forklift mishaps, resulting in lost workdays.
    • Common forklift-related injuries could result from:
      • Hitting a pedestrian with a forklift,
      • Forklift tipover,
      • Improperly positioned loads,
      • Falling from the forks or from a platform positioned on the forks,
      • Falling from a ladder that is struck by a forklift, and
      • Being struck by materials that fall from a forklift.

    When training and evaluating operators on forklifts, make sure you’re training employees appropriately for the equipment involved, each type of piece of powered equipment. So, it is important to know what equipment is used in the workplace.

    OSHA divides Forklifts into five classes:

    • Class One forklifts are powered by electric motors and are generally used inside because of their lack of exhaust fumes.
    • Class Two forklifts are used in narrow aisles for order picking by the forklift itself or by the driver who is raised up.
    • Class Three forklifts have operators who either walk behind or lead the lift. They aren’t actually driven but operators still need to achieve certification.
    • Class Four forklifts are operated by fuel and have solid rubber tires that can only be used on paved surfaces.
    • Class Five forklifts are also operated by fuel, but they have pneumatic tires which allow them to be driven on unpaved roads.

    Whatever class of forklift you operate, OSHA requires training specific to that forklift. Forklifts are powerful and indispensable vehicles that make our lives easier. The power of these machines also makes them extremely dangerous. As such, the training required is imperative.

    Looking to learn more about powered equipment safety? Check out the Powered Equipment Inspection Books I have published on Amazon, or any of my other posts on powered equipment safety

    Here are some safety tips about driving forklifts.

    • Before you drive off make sure that you adjust your seatbelt and buckle up, just like a car.
    • Make sure that you keep the forks low – four to six inches off of the floor. Raised forks damage equipment and insure people.
    • Maintain a speed that will allow you to stop quickly and control your load. A sudden stop can cause a jolt and you could lose your load.
    • Always drive to the right of other vehicles and pedestrians just like you would in a car.
    • Always stop and sound your horn at every corner and doorway – other drivers and pedestrians may not be paying attention. Look both ways before you continue.
    • If you have a load that impairs your vision, then drive backwards and use a co-worker to help you see.
    • Look for hazards before you drive. Know all the problems areas before you lift. Ducts and overhead pipes can be lower than you think and significant damage could occur.
    • If you need to leave the vehicle always put the engine in neutral, set your parking brake and lower the mast to the floor. If you are a slope, block the wheels. All of this will ensure the forklift will not move while you are gone.
    • Manual Handling guidance is easy to provide, however making sure it is used is easier said than done.
    • The regulations state that handling should be eliminated if at all possible. Despite having more labor saving devices than ever before, lifting and moving items is still required and therefore removing the need is not always possible. Even if you outsource your handling requirements, you still retain some responsibility for ensuring the organization moving the equipment has appropriate risk assessments and trained staff in place.
    Check Out: 10 Reasons Why Safety Training is Often Ineffective

    View and Download the Operator Evaluation Form


    Properly filling out this form and conducting an evaluation, will ensure employees properly operate equipment in a safe manner.

    A great way to conduct an evaluation is to set up a course, away from pedestrians, and other critical items. This ensures that hazards are minimized while a new operator is first learning.

    The evaluation portion of the training should include test operations, such as driving with unstable loads, driving in


    Download and View the Forklift Safety Training below


  • Incident Investigation: Top 10 Mistakes

    Incident Investigation: Top 10 Mistakes

    Any professional in the safety & security industry, is probably familiar with writing reports. Writing reports isn’t just a one and done occurrence. Report writing is absolutely essential to successful investigations and case management. This post will explore the purposes and importance of reports as well as provide tips for beginning report writers to refine their skills. There are negative implications to unskilled report writing and may end up halting a person’s career to a standstill. Although many of today’s investigative reports can be completed in preformatted forms, even in an online/mobile format, there are still many scenarios in which one will not have this luxury. It is important to gain a thorough understanding of the purpose of report writing and the uses behind it.

    Let’s examine a few of the ways in which reports are utilized in the workplace:


    1.Accidents in the Workplace

    Incident reports are crucial for corporations and businesses, especially those that are open to the public. Retailers, for example, must be keenly aware of the safety risks that are involved. With high traffic volumes, shelves and displays, potentially dangerous merchandise, escalators, etc., an accident is bound to happen, whether it is a customer or an employee. Filling out a thorough accident report immediately after an accident takes place will save the employer a lot of hassle in the future should any medical or legal issues ensue from the incident. The report can clear the employer of any liability in civil proceedings against the business. These reports are to be written by the individual responding to the scene of the incident.

    Worker’s compensation and insurance fraud is a rapidly growing area of crime with the advancement of technology and the depressed economy. Some employees will jump at the chance to exploit and abuse the system. Writing a report immediately after a workplace incident will lower the risk of worker’s compensation or insurance fraud significantly. It can also alleviate the risk of civil liability should the employee decide to sue the employer afterwards. Employers who maintain an unsafe workplace riddled with safety hazards will find themselves embroiled in administrative fines and civil litigation.

    2.Preliminary Reports

    Preliminary reports are commonly written by uniformed officers when responding to a complaint or a crime. When writing a preliminary report, it should include any all information pertinent to the investigation. This includes information on the individual making the report or the victim, a thorough description or identification of the person making the complaint, details of the incident that transpired, and any other relevant information that can be collected. As Dempsey writes, the preliminary report is like a birth certificate in a case because it begins the investigation (2002, 86). A follow up report is later written to keep tabs on the progress of the investigation and include any new or relevant information gained.

    3.Administrative and Managerial Entities

    The reports one writes throughout his or her career are almost always going to be viewed by third parties. In almost all cases, administrative agencies and supervisors will require that subordinates submit regular reports for the purpose of reviewing progress of an investigation and keeping track of employee productivity. These are sometimes called supervisory review reports (Dempsey, 2002, 84) These reports, when done on a regular basis, help supervisors to keep track of subordinate productivity and the progress being made on all cases.

    4.Chain of Custody and Lab Reports

    Evidence will change hands throughout the course of an investigation. In this case, anyone who claims custody of the evidence must complete a chain of custody report. The report should include a detailed, chronological history of the evidence and should contain a detailed description of when and to whom it changed hands. If there are any discrepancies about the chain of custody, it will be hard to prove in court that the evidence shown at trial is the same that was collected at the crime scene. In this case, it is best to limit the transfer of evidence to as little as possible.

    Lab reports are written regarding any form of evidence that requires a laboratory examination. A request for a laboratory analysis is sent to the lab by the investigator. The forensic analyst who conducted the analysis will then submit a report detailing the results of that analysis. The United States Environmental Protection Agency (EPA) provides instructional courses on sampling procedures, data acquisition, chain of custody, what it is used for, and how the forms are properly used to pass testing samples from one link of the chain of custody to another.

    5.Observations

    When assigned to conduct surveillance, a report written by the investigator conducting the surveillance is called an observation report. The report details all actions that the investigator witnesses during the course of the investigation.


    These are just a few of the many kinds of reports the investigator may come into contact with throughout the course of his or her career!

     Need more components of an incident reporting program? Check out what else I have to help you out here

    Tips on Investigative Report Writing

    1. Follow the Principle of Expansible Significance

    Minor crimes and inconsistencies often turn out to be major crimes or loss events. “Minor is major”! Get all the facts. This includes even the smallest of details. Even if it may seem irrelevant at the time, little pieces of information may manifest themselves as much more significant throughout the course of the investigation.

    2. Write Professionally, but Not Pompously

    The report you are writing won’t just be read by people within your department or your field. Don’t assume that everyone will understand certain things you write in the report, because it will only serve to confuse the readers and will damage your credibility. Keep the high-level vocabulary to a minimum and refrain from use of

    any lingo or vernacular language. “Police talk” may work on the beat between two partners, but it will not work in a formal report.

    3. Write Neatly and Concisely

    The more one writes reports, the easier it will become to spill the words out and get it right after a few tries. A good report will consist of thorough, detailed information but will also be fairly brief and to the point. This may be difficult to do at first, but revising and rewriting the report will aid in honing one’s writing skills. Although many of today’s police and investigation departments are driven by technology and many officers can file reports from their computers, there are instances where they will need to be hand written, especially in times of emergency. Write legibly and make sure others will be able to read the writing.

    4. Keep Reports Organized

    All reports, documents and any audio/visual information should be stored and preserved. Many choose to compile a case folder that keeps everything intact and preserved should it be referred to in the future. This is especially important because it will serve as an easy method of reference and will help to jog the investigator’s memory. Some cases don’t go to court for months or even years, and it is impossible to remember every single detail of the investigation. Having a secure and effective method of storage for cases is extremely beneficial. Always have a hard copy of the report even if it is saved on a computer in case of a power surge or a scenario in which the file couldn’t be accessed or is deleted.

    5. No Notes Equals No Report

    The accuracy and quality of investigative reports is contingent upon the field notes. Constantly writing things down during one’s day-to-day routines will help to establish a solid foundation for a report should an incident arise. During an investigation it is also crucial to follow this strategy. The notes should be factual and accurate. These notes may include but are not limited to:

    • Names of witnesses
    • Notes from interviews of witnesses
    • Vehicle descriptions
    • List of items stolen/broken
    • Names/contact information of victims
    • Time the incident occurred
    • Arrival times of emergency personnel
    • Security or safety hazards such as nonworking lights, broken floor tiles, leaking pipes, etc.
    Check Out: How to Investigate an Accident Or Incident in 9 Easy Steps

    Other Interesting Suggestions that Will Make One a Better Report Writer

    Many people often use the word “did” right before the verb. It is annoying for supervisors and judges to constantly read things such as “I did move the box, I did observe Joe walk through the door”, and “I did enter the facility” and should be avoided. It’s certainly okay to use “did not” to indicate an omission of action, however.

    Try to keep words in the report to less than three syllables.

    Keep the report properly punctuated so that readers can quickly decipher where one idea ends and another begins.

    Jack Dempsey’s NEOTWY format should always be used (2002, 87). The word is an acronym derived from the last letters of When, Where, Who, What, How, and Why. It may sound silly, but it is easy to remember.

    Does the report make sense? Try reading it aloud. If it doesn’t make much sense to the officer or investigator, it won’t make sense to a judge or supervisor.


    What Case Folders May Contain

    • Index sheet
    • Incident report
    • Follow-up or investigatory action reports
    • Interview/Interrogation reports
    • Record checks
    • Photographs, sketches, visual evidence
    • Evidence reports
    • Chain of custody reports
    • Computer printouts
    • Audio/video material
    • Medical examiner reports

    View & Download the Top 10 Incident Investigation Mistakes below:


  • BWC Emergency Action Plan Template

    BWC Emergency Action Plan Template

    free basic template for emergency action planA good business reviews their emergency action plan annually, not just with their employees as OSHA requires, but as a whole to ensure everything is still applicable that it works with your workforce, that it is still the most efficient.

    This Emergency Action Plan is from Ohio’s BWC Office of Industrial Hygiene, it is a basic plan that addresses all applicable subsections of OSHA standard 1910.38.

    This template is best for small businesses, including those that don’t require a written plan, so that they don’t miss a basic subsection.

    If your business requires a more in-depth plan, or your workplace has specialized needs, this plan is not best for you, and instead you should check out some of our other offerings in the membership area.

    Besides having an Emergency Response Plan, every workplace should have a a training on Emergency Response, that explains it to the employees. I have many emergency response plan posts you can check out here.

    How best to utilize this Emergency Action Plan document

    This form will not be 100% applicable to every workplace. So, it is best to rewrite this plan for your company. Simply start with the Scope and Purpose of the plan, as those are completely applicable to any business. Next, adjust the plan to the work performed by your business, and adjust the job titles to those in your workforce.

    EXAMPLE: don’t have or need 40hr trained hazmat representatives in your retail store? Simply omit that portion.

    Doing just a basic rewrite of this plan as outlined above, and using it as a guided template for your personalized plan, then you will be 100% compliant with the OSHA regulations, and more importantly, you will be providing the safest workplace for your employees.

    An emergency action plan is a life saving document, and has many different considerations based upon the workplace, check out what else I have to offer around Emergency Action Plans

    Download & Read the Basic Emergency Response Plan below

  • How to Investigate an Accident Or Incident in 9 Easy Steps

    How to Investigate an Accident Or Incident in 9 Easy Steps

    When an accident happens in the workplace, it is critical to conduct an accident investigation to determine the root cause of the events that led to the accident or injury. The point of the investigation should never be to assign blame, but rather to uncover the factors that led to accident so you can take corrective action to prevent it from happening again.


    Get the overall picture by interviewing the people who know most about the accident or incident. This will enable you to carry out a thorough accident investigation.

    The 9 steps to conducting an effective accident investigation interview are:

    1) Create the “right” environment. Create an atmosphere of co-operation. Explain reason for the interview- prevention. Ask for person’s help. Ask your questions and listen carefully to the answers. Make notes and draw diagrams.

    2) Interview as close as possible to the site of the accident/incident. This helps the accuracy of the witnesses because they are able to point and sometimes demonstrate what actually happened. At this stage, make absolutely certain you know where the witness was standing when the accident or the incident took place. This is because sometimes witnesses could not have seen what actually happened from where they were standing. There is a tendency for witnesses to assume what actually happened, even when they didn’t see it.

    Check Out: 7 Problems Interviewing Witnesses to Workplace Accidents and Incidents

    3) Discussions should be private. When you interview the witnesses, interview them one at a time. This will give you better information and there is no conflict with witnesses arguing about what happened. If descriptions don’t match there is only one option. Re-interview

    4) Get the person’s perception of the accident/incident. Make sure that there is no outside influence or bias and as you listen remember to try not to interrupt. At this stage you are gathering information only. There is no need to evaluate the accident or the incident until you have collected all the information possible.

    5) Listen more than you talk. Encourage the person to talk, listen to the answers and help the person not to become defensive or accept any blame for the accident or incident. Remember, the more they talk, the more you will learn.

    Need more components of an Incident investigation program

    6) Repeat the story back once you have heard it. Once you have heard the witness’s account firstly check your understanding by repeating the account back to the witness. This gives the person a chance to hear what they’ve said and correct or confirm it. The repetition allows the words and meanings to be matched.

    7) End the discussion by thanking the person for their help. Thank the person for their help and cooperation and repeat that you are gathering information so that this sort of incident can be prevented in the future.

    8) Note vital information at once. Make notes rather than try to write down the complete dialogue unless the person gave you some really critical information.

    Check the Root Cause Book I have published on Amazon

    9) Keep open the opportunity for further communication. Give the person the opportunity to get back to you in case they remember something at a later date. It always pays to go back to the person the following day or so, and have a casual conversation about the incident. Often vital information is a gathered at this point.

  • DHS Bomb Threat Checklist

    DHS Bomb Threat Checklist

    Bomb threats or suspicious items must always be taken seriously. How you react to a bomb threat can be the difference of people living or dying. So what should you do?


    Whether the bomb threat is made via phone, handwritten note, email, or other means, the DHS Bomb Threat Checklist provides instructions on how to respond to a bomb threat and a comprehensive list of information that will assist law enforcement in a bomb threat investigation.

    Bomb threats are primarily received via phone, but are also made in person, via email, written note, or other means. Most bomb threats are made by individuals wanting to create an atmosphere of anxiety and panic. Every bomb threat is unique and should be handled in the context of the facility or environment in which it occurs. Facility supervisors and law enforcement will be in the best position to determine the credibility of the threat.

    Follow these procedures in the event of a bomb threat :

    • Remain calm.
    • Notify authorities immediately:
      • Notify your facility supervisor, such as a manager, operator, or administrator, or follow your facility’s standard operating procedure. (See below for assistance with developing a plan for your facility or location.)
      • Call 9-1-1 or your local law enforcement if no facility supervisor is available.
    Check Out: Emergency Response Plan Best Practices

    For threats made via phone:

    • Keep the caller on the line as long as possible. Be polite and show interest to keep them talking.
    • DO NOT HANG UP, even if the caller does.
    • If possible, signal or pass a note to other staff to listen and help notify authorities.
    • Write down as much information as possible—caller ID number, exact wording of threat, type of voice or behavior, etc.—that will aid investigators.
    • Record the call, if possible.


    Download the DHS Bomb Threat Checklist below

    View the DHS Bomb Threat Checklist below