Category: Safety

  • Powered Industrial Vehicle Policy

    Powered Industrial Vehicle Policy

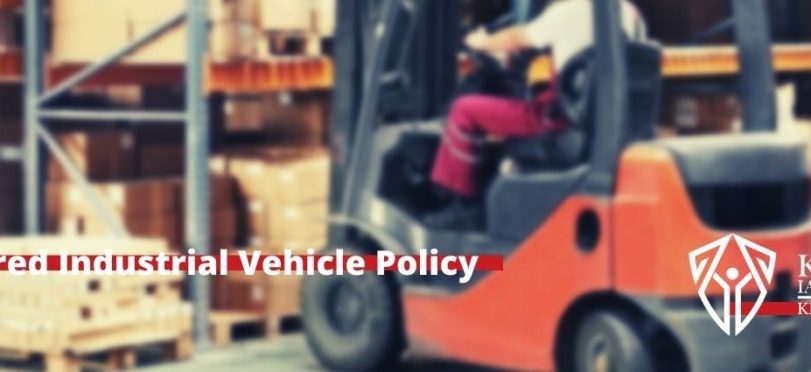
    Powered Industrial Vehicles(or Trucks) are used across many industries. Unfortunately many businesses, big and small, fail to follow OSHA guidelines when it comes to these types of machines.

    What is considered a powered industrial vehicle?

    This can be a piece of equipment that gets power from batteries, propane, gasoline, or other fuel source. The tires can be solid, pneumatic, or cushion. It can be driven inside, outside, or over rough terrain.

    OSHA has 7 distinct classes of powered industrial vehicles, and you can see them here.

    Electric Motor Rider Trucks is an overly broad classification, let’s look in-depth

    Electric Motor Rider Trucks: These are any battery powered vehicle, in which the operator can sit or stand, in which product in handled with forks. Within this class there are many commonly used pieces of equipment:

    • Forklift: this is your standard, sit or stand equipment in which the forks go up and down. Some of these can only go to a height of 10-12′, commonly called a dock stocker for use within semi trailers, or other height limited areas. Some of these trucks can reach 300 inches high, commonly called high reach trucks, these are used in warehouses with high racking. The best and safest of these include cameras near the fork guards, so the operator can see where product is going high up.
    • Reach Truck: these are generally standing operator trucks, and besides the forks traveling up and down, the forks also travel forward, 2-3 feet. These trucks are good in narrow areas, such as warehouse or store aisles. The height of these trucks can range from short(10-12′) or tall(300″).
    • Swing Reach Truck: These are commonly called “Turret Trucks”, in which the operator travels in the air with the load. The forks travel up and down like a standard reach truck, they also move forward like a reach truck, but the forks also swing from side to side, so product can be moved on the sides without turning the truck.

    I have forklift training available here, which is important to keeping employees in the workplace safe.

    Also, if you’re looking for a bit more for your powered equipment program, I also have PE inspection books published on Amazon

    Now, with the equipment better defined, let’s look at the importance of a powered industrial vehicle policy.

    A powered industrial vehicle policy is the basis for safe operation of powered industrial equipment within a facility. It establishes standards for operating, training, and discipline. This policy has to be more than lip service, as powered equipment is heavy and dangerous.

    The below policy goes further than the basics and includes a short sections on changing/charging batteries, dock safety, and maintenance. This ensures employees are aware of the additional hazards of this equipment.


    Download & View the Powered Industrial Vehicle Policy below


  • Simple Incident Investigation Policy

    Simple Incident Investigation Policy

    Accidents happen in the workplace. It’s an unfortunate but true fact. In despite of all the hard work companies do to avoid accidents, occasionally something goes wrong. When it does it’s important to conduct a thorough investigation into what went wrong. After all, it’s even more of a tragedy if someone else gets hurt or killed in the same way and there was something that could have been done differently to stop it.

    The cause of some accidents is obvious, but that’s not always the case. By following clear and concise steps, investigators can uncover underlying causes of a mishap. An Accident Investigation has two main goals. One is to determine the cause of the accident. The other is to use this information to prevent similar accidents from happening in the future. Everyone in a company should be ready to help investigators solve the investigation. While this may be difficult for some employees, they need to be reminded of the ultimate goal of the investigation – a safer workplace.

    How to Investigate an Accident Or Incident in 9 Easy Steps

    Get the overall picture by interviewing the people who know most about the accident or incident. This will enable you to carry out a thorough accident investigation.

    1) Create the “right” environment. Create an atmosphere of co-operation. Explain reason for the interview- prevention. Ask for person’s help. Ask your questions and listen carefully to the answers. Make notes and draw diagrams.

    2) Interview as close as possible to the site of the accident/incident. This helps the accuracy of the witnesses because they are able to point and sometimes demonstrate what actually happened. At this stage, make absolutely certain you know where the witness was standing when the accident or the incident took place. This is because sometimes witnesses could not have seen what actually happened from where they were standing. There is a tendency for witnesses to assume what actually happened, even when they didn’t see it.

    3) Discussions should be private When you interview the witnesses, interview them one at a time. This will give you better information and there is no conflict with witnesses arguing about what happened. If descriptions don’t match there is only one option. Re-interview

    4) Get the person’s perception of the accident/incident. Make sure that there is no outside influence or bias and as you listen remember to try not to interrupt. At this stage you are gathering information only. There is no need to evaluate the accident or the incident until you have collected all the information possible.

    5) Listen more than you talk. Encourage the person to talk, listen to the answers and help the person not to become defensive or accept any blame for the accident or incident. Remember, the more they talk, the more you will learn.

    6) Repeat the story back once you have heard it Once you have heard the witness’s account firstly check your understanding by repeating the account back to the witness. This gives the person a chance to hear what they’ve said and correct or confirm it. The repetition allows the words and meanings to be matched.

    7) End the discussion by thanking the person for their help. Thank the person for their help and cooperation and repeat that you are gathering information so that this sort of incident can be prevented in the future.

    8) Note vital information at once. Make notes rather than try to write down the complete dialogue unless the person gave you some really critical information.

    9) Keep open the opportunity for further communication. Give the person the opportunity to get back to you in case they remember something at a later date. It always pays to go back to the person the following day or so, and have a casual conversation about the incident. Often vital information is a gathered at this point.

    Check Out: Incident Investigation: Top 10 Mistakes

    While a lot can be learned from accidents, we can learn also learn from “near misses” as well. Those incidents that didn’t involve an accident but could have easily had terrible result. Make sure that near-misses are always reported so that your supervisor can address them. The information learned from a near-miss is far less expensive than what is learned from an accident. Remember, prevention is always the best cure.

    No matter how safe workers do their jobs, an accident can always happen. Make sure you follow the basic steps to enable accident investigators to do their job correctly and find the “root cause” of the incident. An accident investigation can create a safer workplace and that’s good for everyone. Who knows it might save a life some day.

    Download & view the Simple Accident Investigation Policy below:


  • Workplace Safety Meetings – 7 Ways To Increase Their Effectiveness

    Workplace Safety Meetings – 7 Ways To Increase Their Effectiveness

    Have you ever wished your workplace safety meetings were more interesting, more engaging, more productive, and more rewarding?

    Perhaps you desire to improve your work force’s knowledge of office safety or general ethics of safety at work- but you just run out of ideas on how best to do this.

    Then you need not bother yourself again. I know it can be very demanding trying to bring out different workplace safety spices to make your safety meeting your local “OSHA Training” ground!

    Listed below are the 7 tips to bring back life and passion into your safety meeting topics and general presentations.

    1. Have A Schedule Indicating Identified Topics and Presenters Well In Advance.

    When you draw up your workplace safety meeting schedule, you provide the presenters ample time to prepare for the safety presentation therefore ensuring a better presentation the meeting.

    Remember the 6 P’s?: “Poor Prior Preparation Produces Poor Performance”

    So, draw up a schedule and post it conspicuously at your workplace.


    Need topics to present on? We offer 12 months of safety meeting topics


    1. ALWAYS Allow For An Interactive (Question and Answer) Session:

    Make it as informal as possible to encourage interactive participation.

    This is one of the basic features of a successful safety meeting.

    This session allow the workforce to ask questions, present scenarios for brainstorming, among others. Do not make it a monologue! Encourage the interactions.

    1. Use a Variety of Presentation Aids And Resources To Reinforce The Safety Lesson.

    These include Safety Training Videos, Health and Safety Quizzes, Safety Puzzles, etc.

    These also serve as spicing that engage the workforce and give them something to look up to.

    1. Institute Award & Recognition Program for Safety Meeting Presenters.

    This encourages outstanding lesson presentations and also stimulates startling lesson presentations. Know what these boil down to?

    Better Safety training for your workplace!

    1. Keep to your time frames. Ensure proper time management.

    In as much as you will encourage mutual interactions during the session, you also need to strike a balance by having a moderator keep the time frames within your preplanned brackets.

    Time management is very critical to the success of this workplace safety training sessions.

    If you need more topics for Safety Toolbox Talks, I have many books available on Amazon, check them out here
    1. Ask Safety Lesson Presenters to Always Include Review Questions At The End Of The Presentation.

    This also engages the listeners, reinforces the lesson shared and helps in lesson retention.

    Besides, it also serves as a measure of the work group’s understanding of the safety lesson.

    1. Finally, let your workplace management be involved by always attending the safety meetings.

    This show of commitment will ginger interest and seriousness within the workforce as well.

    By carefully implementing the above outlined tips in your safety meetings, you will certainly improve the safety education of your workforce, as well as ensuring a better workplace safety standard at your work place.

  • Aerial Lifts

    Aerial Lifts

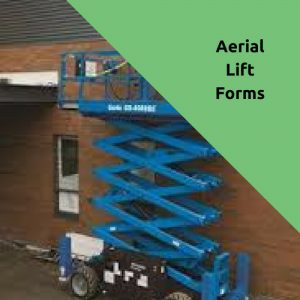
    Aerial lifts, often called scissor lifts, are powered and mobile platforms that are used for elevating workers to various heights, which exposes workers to fall hazards.

    An aerial lift presents an interesting situation in the workplace. Many employers treat these as powered equipment, when by regulation, they are actually considered scaffolding and have different requirements. This isn’t to say that aerial equipment is to be used without training, but the training and records are different.

    If your workplace uses a scissor lift, it is important to know how to operate the equipment safely and in compliance to all relevant regulations.

    To learn more about OSHA regulations pertaining to scissor lifts, there is this handy fact sheet, put out by OSHA.

    For convenience I am including it in reader view below.

    If you need other components of a powered equipment program, check out all I offer here

    Why Aerial Lift Safety Training Matters:

    • OSHA estimates that there are about 68,000 fall-related injuries in the workplace each year.
    • OSHA requires equipment with aerial lifts to be designed and constructed according to certain standards. The primary goal is to protect the worker in the lift by providing fail-safe mechanisms that will prevent a free-fall descent of the work platform.
    • One of the primary hazards of working in aerial lifts is falling out of the lift.
    • If you work in aerial lifts or near them on the ground, you need to understand the hazards, the basic regulatory requirements, and the safety work practices that must be followed to prevent accidents and injuries.

    NIOSH offers a free simultor for aerial lifts, which shouldn’t be used in place of full and proper training of operators, but can be used to augment the training offered in the workplace.

    Below is the NIOSH Fact Sheet on Aerial Lifts and their simulator:

    You can find the NIOSH Aerial Lift Simulator here


     View and download all components of an Aerial lift safety program below

    Key Points:

    • Aerial lifts are useful pieces of equipment but can also be hazardous.
    • Lifts must be operated properly to prevent accidents and injuries.
    • Only trained and authorized employees are allowed to use aerial lifts.
    • Inspect equipment and the work area before each use.
    • Understand and follow safe work practices, including wearing fall protection equipment.
    • Be especially careful when working around power lines.


    No quality training program is complete without an evaluation, so ensure that employees are observed in their operation of the aerial lift by a competent person.


    Even with well trained employees operating aerial lifts, safety in the workplace is only as good as the equipment being used. The aerial lift, like powered equipment, should be inspected daily, before use, to ensure it is safe to operate.

    Like powered equipment, this inspection is not required to be written, but written forms allow for proper auditing of program compliance, while also providing a paper trail to address issues.

  • Accident Prevention Planning Form

    Accident Prevention Planning Form

    After conducting a thorough accident investigation, you will come up with corrective actions. These corrective actions need to be implemented for change management.

    Corrective and preventative actions are generated from varying sources including safety meetings, inspections, accident investigations, unsafe act and unsafe condition reporting and from audits, and are simply measures that need to be undertaken to ensure that a particular requirement is implemented.


    These actions can be either corrective actions or preventative actions;

    • a corrective action means a situation has been re-instated to its original state, so replacing a machine guard that was improperly removed that caused an injury is a corrective action;
    • a preventative action will put into place arrangements which will prevent a re-occurrence, to stop the machine guard from being removed improperly in the first place.

    An action that many think of as “common sense” and “simple” continues to appear on 3rd party audit reports and OSHA/EPA citations year after year.  So why is something which is “common sense” and “simple” so difficult to comply with?  Often times we make something simple too difficult for our own good.  Lets examine the PSM/RMP requirements for tracking “recommendations” from process safety activities:

    1910.119(e)(5) The employer shall establish a system to promptly address the team’s findings and recommendations; assure that the recommendations are resolved in a timely manner and that the resolution is documented; document what actions are to be taken; complete actions as soon as possible; develop a written schedule of when these actions are to be completed;  communicate the actions to operating, maintenance and other employees whose work assignments are in the process and who may be affected by the recommendations or actions.

    1910.119(j)(5) Equipment deficiencies. The employer shall correct deficiencies in equipment that are outside acceptable limits (defined by the process safety information in paragraph (d) of this section) before further use or in a safe and timely manner when necessary means are taken to assure safe operation.

    1910.119(m)(5) The employer shall establish a system to promptly address and resolve the incident report findings and recommendations. Resolutions and corrective actions shall be documented.

    1910.119(o)(4) The employer shall promptly determine and document an appropriate response to each of the findings of the compliance audit, and document that deficiencies have been corrected.

    Use of a tracking form is considered an accident prevention best practice

    By using a tracking form, all corrective or preventative actions, can be tracked for compliance, or more importantly for quality of action taken.

    With all of this in mind, look at the corrective action tracking form below, and see how it can aid your organization and corrective safety measures:


  • Fatality, Amputation, and Hospitalization Report

    Fatality, Amputation, and Hospitalization Report

    OSHA has specific reporting requirements for serious injuries that occur within a facility.

    The OSHA notification requirements are as follows:

    • Hospitalization: This is for a work related hospitalization, and must be reported within 24 hours;
    • Amputation: This is for a work related amputation, and must be reported within 24 hours;
    • Loss of Eye: This is for a work related loss of eye, and must be reported within 24 hours;
    • Fatality: This includes all fatalities that occur within the workplace, and must be reported within 8 hours.


    Note the difference of any fatality, being required to report within 8 hours AND for ANY fatality within a workplace.

    For Example: if an employee suffers a heart attack, the fatality should result in a call to OSHA.

    When these incidents occur, it is a turbulent time in the workplace. Having a process in place, with a basic form, such as this report helps keep the process streamlined.

    This report includes all the information OSHA requires:

    • Business name;
    • names of employees affected;
    • location and time of the incident,
    • brief description of the incident;
    • contact person and phone number.

    Source

    How does OSHA define “Hospitalization”?

    OSHA defines in-patient hospitalization as a formal admission to the in-patient service of a hospital or clinic for care or treatment. Treatment in an Emergency Room only is not reportable.

    How does OSHA define “amputation”?

    An amputation is the traumatic loss of all or part of a limb or other external body part. This would include fingertip amputations with or without bone loss; medical amputations resulting from irreparable damage; and amputations of body parts that have since been reattached. If and when there is a health care professional’s diagnosis available, the employer should rely on that diagnosis.

    If a fatality occurs within 30 days of the work-related incident, or if an in-patient hospitalization, amputation, or loss of an eye occurs within 24 hours of the work-related incident, then you must report the event to OSHA.


    This form is a beneficial component of a total accident investigation program. If you feel your organization needs more components of an incident investigation program, find them here.


    Download and view the Amputation, Hospitalization & Fatality report form below:

  • Does your workplace need fall protection?

    Does your workplace need fall protection?

    Does your workplace need fall protection?

    Do you know what is needed to keep your employees safe and within regulation?

    Fall Protection Requirements in 1910 General Industry

    OSHA requires some form of fall protection for employees working at heights greater than four (4) feet in General Industry (1910). Many are unaware that there are numerous other OSHA standards requiring fall protection at other heights; some are lower, some are higher, and some only apply (or do not apply) in certain situations.

    There are Federal OSHA standards which mandate guardrails or some other form of fall protection system be utilized to protect workers from falls of greater than four (4) feet. Included among these are 1910.23(c), which requires a standard guardrail (or equivalent) be installed along unprotected edges of open-sided floors, platforms, and runways greater than four (4) feet above the floor or lower level. And in that same subpart you will find 1910.23(b), which requires fall protection (typically rails or covers) at wall and floor openings of various types, such as stairwells, chute openings, and ladder openings.

    However, paragraph 1910.23(c)(3) requires a standard guardrail be installed along open sides of any open-sided floor, walkway, platform, or runway located above or along the side of  dangerous equipment, pickling or galvanizing tanks, degreasing units, and similar hazards, regardless of its height. And paragraph 1910.23(d)(1) requires a stair rail to be installed on each open side of any flight of stairs having four or more risers; on many smaller industrial stairs with just a few risers, this could easily be less than four (4) feet high. So there you have a couple of examples where fall protection is required at less than the four (4) foot threshold.

    Check Out: Fall Protection Program

    There are also numerous OSHA general industry standards for various types of scaffolding which require guardrails be installed along open sides and ends of work platforms, but only if they are located greater than ten (10) feet above the ground or floor. See 1910.28(b)(15), (c)(14), (d)(7), (f)(15), (g)(5), (h)(8), (k)(5), (m)(7), (o)(2), and (p)(7) for the specific requirements for rails to be placed on these types of scaffolds. However, there are a few types of suspended scaffolds, such as float or ship scaffolds [1910.28(u)], two-point suspension scaffolds [1910.28(g)(9)] and a boatswains chair [1910.28(j)] which require the worker(s) be protected from falls by wearing a “safety lifebelt” attached to a lifeline, regardless of the height. But the requirements for needle beam scaffolds [1910.28(n)] requires only those workers located 20 feet or more above the ground or floor and working with both hands be protected by a “safety life-belt” attached to a lifeline.

    OSHA standard 1910.27(d)(1)(ii) requires fixed ladders be equipped with cages or wells on ladders of more than 20 feet (to a maximum unbroken length of 30 feet). However, fixed ladders on towers, water tanks, and chimney ladders that are over 20 feet in unbroken length may be equipped with suitable safety devices such as lifebelts, friction brakes, and sliding attachments in lieu of cages.

    OSHA standard 1910.66(f)(5)(i)(G) requires that each working platform of powered platforms used for building maintenance be provided with a guardrail system on all sides. And standard 1910.66(f)(5)(ii)(M) requires a vertical lifeline be provided as part of a fall arrest system meeting the requirements of appendix C of that standard for each employee on a working platform suspended by two or more wire ropes  if the failure of one wire rope or suspension attachment would cause the platform to be upset. However, if a secondary wire rope suspension is used, then vertical lifelines are not required for the fall arrest system provided that each employee is attached to a horizontal lifeline anchored to the platform.

    OSHA standard 1910.67(c)(2)(v) for aerial boom-lifts requires the user(s) to wear a body belt with lanyard attached to the boom or basket when working in the basket. There is no height specified for this requirement, which is related to the purpose of tying off; this is a body positioning device to keep the person from being thrown out of the basket, as opposed to a fall arrest system.

    Check Out: Harness and Lanyard Inspection

    There are also fall protection requirements appearing in several of the OSHA standards for specialty industries, such as those regulating paper, pulp, and paperboard mills. 1910.261(e)(4) requires that protective equipment be provided for persons working over water. Furthermore, OSHA standard 1910.261(e)(12)(i) requires that when platforms or floors allow access to the sides of continuous barking drums, a standard railing shall be constructed around the drums. And employees working around the broke hole for pulp and paper machinery must be protected from falling into the hole by a guardrail [see 1910.261(k)(13)(i)], or, in cases where the pulpers are located directly below the broke hole on a paper machine and the broke hole opening is large enough to permit a worker to fall through, any employee pushing broke down the hole must wear a safety belt attached to a safety belt line which is rigged so that it is impossible for the person to fall into the pulper [1910.261(k)(13)(ii)].

  • Basic Emergency Response Plan

    Basic Emergency Response Plan

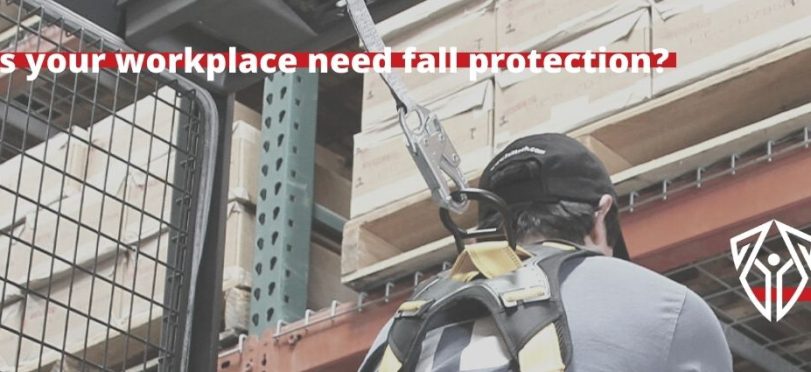
    This Basic Emergency Response Plan template is useful for small businesses that want an emergency response plan, when it is only required to have a verbal plan. Having a written plan over a verbal plan provides additional safeguards, so all employees know the same responses to emergencies, and it can be referenced during an actual emergency.

    During an emergency in the workplace, it can seem chaotic. People forget what they have been taught, people forget numbers; which can potentially make the situation worse.

    If planning on using this form as an addition to your workplace’s verbal plan, ensure it is communicated to employee’s, ensure it is posted prominently in the workplace, ensure it is easily accessible in an emergency.

    Why have a workplace emergency response plan?

    Besides the major benefit of providing guidance during an emergency, developing the plan has other advantages. You may discover unrecognized hazardous conditions that would aggravate an emergency situation and you can work to eliminate them. The planning process may bring to light deficiencies, such as the lack of resources (equipment, trained personnel, supplies), or items that can be rectified before an emergency occurs. In addition an emergency plan promotes safety awareness and shows the organization’s commitment to the safety of workers.

    The lack of an emergency plan could lead to severe losses such as multiple casualties and possible financial collapse of the organization.

    An attitude of “it can’t happen here” may be present. People may not be willing to take the time and effort to examine the problem. However, emergency planning is an important part of company operation.

    Since emergencies will occur, preplanning is necessary. An urgent need for rapid decisions, shortage of time, and lack of resources and trained personnel can lead to chaos during an emergency. Time and circumstances in an emergency mean that normal channels of authority and communication cannot be relied upon to function routinely. The stress of the situation can lead to poor judgment resulting in severe losses.

    Related Post:  DHS Bomb Threat Checklist

    What is the objective of a quality emergency response plan?

    An emergency plan specifies procedures for handling sudden or unexpected situations. The objective is to be prepared to:

    • Prevent fatalities and injuries.
    • Reduce damage to buildings, stock, and equipment.
    • Protect the environment and the community.
    • Accelerate the resumption of normal operations.
    Check Out: Emergency Response Plan Best Practices

    View and Download the Basic Emergency Response Plan template below:


  • Accident Investigation Report

    Accident Investigation Report

    A proper investigation after an accident is best summarized with a post accident investigation report.

    This form is a summary of your entire investigation, and should be completed with assistance from all statements, evidence, witnesses, and the injured party.

    Accident investigations are intended to determine the cause of an incident, to identify unsafe conditions or acts and to recommend corrective actions so that similar incidents don’t occur in the future. In conducting an accident investigation, the team must look beyond the immediate causes of an incident. It is far too easy, and often misleading, to conclude that carelessness or failure to follow a procedure alone was the cause of an incident. The purpose is prevention, not blame. To do so fails to discover the underlying or root causes of the incident, and therefore fails to identify the systemic changes and measures needed to prevent future incidents. When a shortcoming is identified, it is important to ask why it existed and why it was not previously addressed. After an investigation, employers should without any undue delay take corrective actions to mitigate all of the identified hazards.

    For example:

    • If a procedure or safety rule was not followed, why was the procedure or rule not followed? This might be an opportunity to review the workplace job hazard analysis, and determine if the rule is appropriate.
    • Did production pressures play a role, and, if so, why were production pressures permitted to jeopardize safety?
    • Was the procedure out-of-date or safety training inadequate? If so, why had the problem not been previously identified, or, if it had been identified, why had it not been addressed?


    Following these steps can make for an effective accident investigation process, allowing for better identification of all contributing factors:

    • Report the accident to the designated person
    • Provide first aid and medical care to injured person(s) and prevent further injuries or damage
    • Investigate the accident
    • Identify the causes
    • Report the findings
    • Develop a plan for corrective action
    • Implement the plan
    • Evaluate the effectiveness of the corrective action
    • Make changes for continuous improvement


    View & Download the Accident Investigation Report below:


  • Contributing Factors: Lift, Push, Pull Injuries

    Contributing Factors: Lift, Push, Pull Injuries

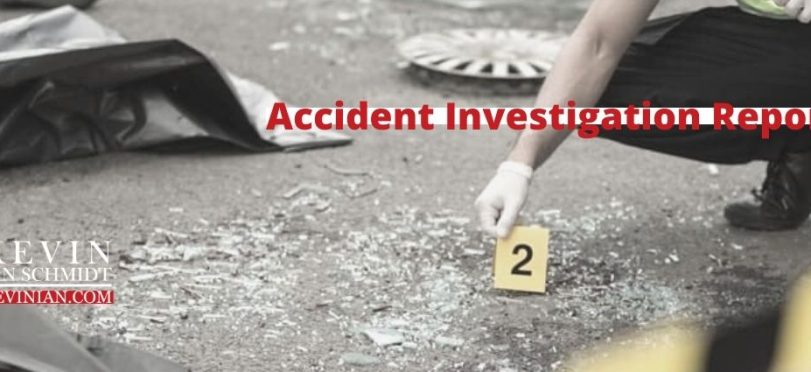
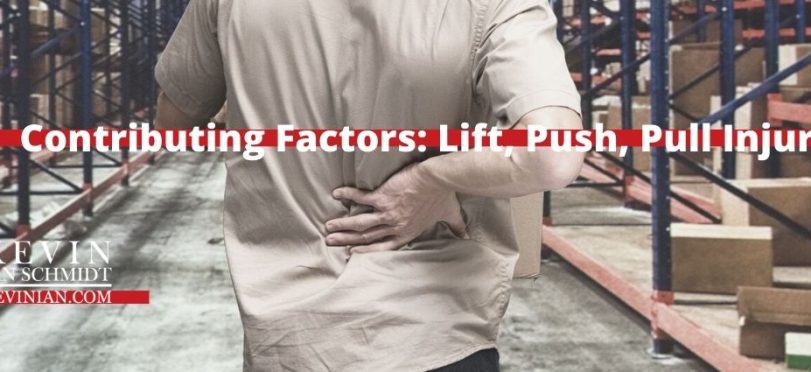
    Musculoskeletal disorders (MSDs), these are injuries to the skeleton, muscles, cartilage, tendons, ligaments and joints that support and bind tissues and organs together so the body can move and sustain itself.

    MSDs are the most common injury at work. They cost the economy dearly in lost productivity and high workers compensation costs. This is despite known and accessible methods to prevent or minimize risk of injury.

    The sources of risk are well known. They are poorly planned work processes, unsafe workplace layout and tasks done unsafely.

    The most common Musculoskeletal disorders are:

    • Neck:
      • Tension Neck Syndrome,
      • Cervical Spine Syndrome;
    • Shoulder:
      • Shoulder Tendonitis,
      • Shoulder Bursitis,
      • Thoracic Outlet Syndrome;
    • Elbow:
      • Epicondylitis,
      • Olecranon Bursitis,
      • Radial Tunnel Syndrome,
      • Cubital Tunnel Syndrome;
    • Wrist/Hand:
      • De Quervain Disease,
      • Tenosynovitis Wrist / Hand,
      • Synovial Cyst,
      • Trigger Finger,
      • Carpal Tunnel Syndrome,
      • Guyon’s Canal Syndrome,
      • Hand-Arm Syndrome,
      • Hypothenar Hammer Syndrome.

    The Canadian Centre for Occupational Health & Safety has a very in-depth article concerning MSDs here.

    There is nothing inherently wrong with relying on lifting, pulling or pushing to do work. Many tasks still cannot be done any other way even with advances in some industries to automate much heavy and repetitive manual work.

    When conducting an incident investigation after an incident from a lifting, pushing, pulling incident, you need to consider all contributing factors.

    This form is a list of factors to consider in the course of an investigation. As with any root cause investigation, it can be a mix of contributing factors vs just a single factor.

    Some of the factors here are not simple corrections, where as other factors are easily corrected with training, awareness, or procedural change.

    Don’t be afraid of change management simply because it appears daunting.

    Do you have all of the required accident investigation forms you would need to improve workplace safety? You can find more components of a quality program here.

    View & Download the Contributing Factor Worksheet here: