Confined Space Entry is a complex topic to say the least. These entries are different every time even though the same equipment is used each time. The same crew may be utilized as well, however conditions more than likely will differ on each occasion. These could include toxic fumes, gas leaks and reduced oxygen levels. These conditions are so detrimental that you could pass out at any moment. For this reason, permits are required as enforced by Confined Space Regulation.
These spaces may be large enough to enter, but that is about it. Movement is quite limited there. People can work in them but certainly not for extended periods.
There are varieties of different places that qualify as confined spaces. These would be pits, vaults, hoppers, storage bins, vessels and tanks. Hazards are different depending on the kind of space involved. You need to be aware of spaces that contain toxic or flammable vapors and gases. There may be and excess of oxygen or a decrease of oxygen, either situation is not healthy. Cramped areas could cause suffocation to happen.
One-way to avoid getting involved with these hazards is to try doing the work outside of the confined space. For practical reasons this is not always possible. The workers will have to establish facilities in which to work in and permit space entry programs are needed to regulate entrance into the confined spaces. At all danger points, an entry permit in writing is to be used. Danger signs should be visible at all entry points where the hazardous work is going to begin. These signs will indicate either that the space is off limits or entry is only permissible with a written permit.
Training is provided as part of the course. There is a variety of posts for which training is required and these include, entrant attendant or entry supervisor. Determining acceptable entry conditions, terminating entry projects as well as overseeing these are the responsibility of the entry supervisor.
Another important responsibility of the supervisor is to manage atmospheric testing. Three different types of tests exist for this kind of testing. The order in which they are done which is very specific is, determining the oxygen content, next to see if flammable gases are present and lastly to identify contaminants especially if they are toxic.
The oxygen content test is first and the level cannot be lower than nineteen and a half percent, this will prohibit the person from doing physical work, as he will not be able to breath. Conversely, an oxygen level of twenty-three and a half percent or higher could be the catalyst to cause an explosion or fire.
Secondly, the gases and vapors need to be limited to fewer than ten percent of their inflammable limit. In this environment, there are many flammable gases to be found.
Confined Space Entry work is clearly very complex and potentially harmful. The right type of person needs to be selected to do this work. He will also require comprehensive training for the job.
Download the OSHA 3138 Guidelines for Permit Required Confined Spaces below
View the OSHA 3138 Guidelines for Permit Required Confined Spaces below
A Toolbox Talk is an informal safety meeting, conducted at the job site prior to the commencement of a job or work shift. Toolbox talks focus on safety aspects related to the specific job at hand. These meetings are normally 10-15 minutes, and cover topics such as workplace hazards and safe work practices.
Toolbox talks are a very effective way to refresh workers’ knowledge, cover last minute safety checks and exchange information with experienced workers.
The Occupational Health and Safety Act (OHSA) requires organizations in some industries to conduct safety talks and training. According to the OHSA, you have a duty to protect your employees and to ensure you train them on the risks around them and how perform job tasks safely. Toolbox Talks are an effective way to comply with these obligations. They are not intended to take the place of formal OSHA safety training for workers. Talks are meant to supplement training and serve as reminders of your organization’s safety goals.
Here are 4 tips for a quality Toolbox Talk
1. Talk directly to your audience. Ensure the topic is relevant to your industry and worksite. You can also focus on their personal agenda—staying safe so they can attend their kid’s soccer game after work, participate in off-the-job hobbies and continue providing for their families. Make sure the talk matters to employees both on and off the job. If workers don’t feel the topic applies directly to them you will have a hard time keeping their interest.
2. Keep it brief. People have limited attention spans and they’ll eventually start tuning you out no matter how important the topic of your toolbox talk is. Make only the necessary points, and put additional information in a handout or a follow-up toolbox talk on a later day.
3. Stay positive! Incident investigations are a reactive approach to something negative happening—and toolbox talks can be the exact opposite. They’re an opportunity to proactively encourage safe behavior before an incident takes place. Keep the focus on what can be done to create a safe workplace instead of focusing on what has gone wrong in the past.
4. Demonstrate your point. Nobody wants to feel like they’re at a lecture so try to make your talk interactive – when the audience is involved they are more likely to pay attention. Demonstrations, discussions and hands-on examples are all effective ways to get people to participate—and it will help them retain more of the information too.
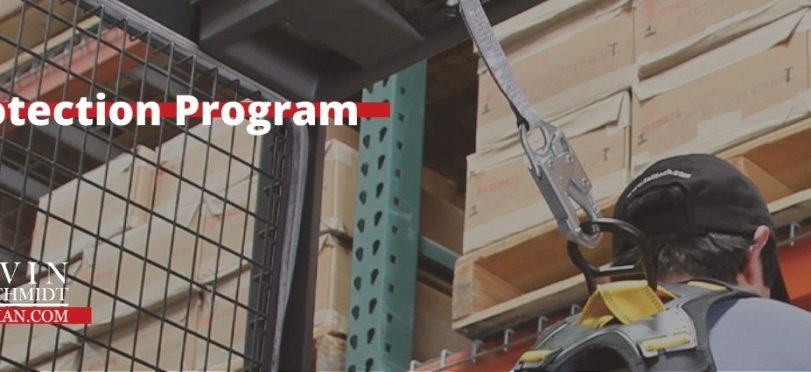
Fall protection is often seen as only a construction standard for safety, but it is equally important for general industry employee safety as well.
A quality fall protection program is the basis for ensuring employee safety when working at heights, this can include using powered equipment such a scissor lifts or order pickers, or working on unguarded surfaces above 4 feet.
This policy spells out all important aspects of fall protection for employee safety:
To prevent employees from being injured from falls, employers must:
Guard every floor hole into which a worker can accidentally walk by use of a railing and toeboard or a floor hole cover.
Provide a guardrail and toeboard around every open-sided platform, floor or runway that is 4 feet or higher off the ground or next level.
Regardless of height, if a worker can fall into or onto dangerous machines or equipment (such as a vat of acid or a conveyor belt), employers must provide guardrails and toeboards to prevent workers from falling and getting injured.
Other means of fall protection that may be required on certain jobs include safety harness and line, safety nets, stair railings and handrails.
These tips will help you remember the safe way to do things.
Never work off the ground when you are extremely tired or under extreme stress. Your reflexes need to be at 100% to work in this dangerous environment.
Never work off the ground if you are under the influence of drugs or alcohol. This applies to prescription drugs that might alter your balance or mind.
Never forget to remove tripping hazards. Tools, equipment and debris must be removed from all walking areas. They are responsible for a large percentage of workplace injuries above and on the ground.
Never forget to watch your step. It sounds simple but you need to always be alert and aware of your environment above the ground. Things are active in a work environment and every time you enter an area things could have changed. Loose boards or debris could suddenly appear in an area they weren’t at five minutes ago.
Never forget about personal protective equipment. Personal protective equipment can range from hard hats and gloves, to complex safety harnesses and netting and railing. Know your workplace and know what is required and never waiver from safety procedures.
Never work in an off the ground environment without completing mandated OSHA training. The training is there for a reason – to protect you. Having the knowledge needed to work safety is critical to avoiding injuries and even death.
Welding is a general term for various processes used to join metal parts by producing a coalescence, called a weld, at a joint. This is usually done by applying heat and energy when bringing the pieces of metal together.
Welding has many applications. Some welded products include ships, aircraft, automobiles, electric and electronic parts, and in building and construction work. Although over 50 welding processes are used today, the most common ones are gas welding and arc welding.
Welding is a hazardous process that joins materials together by melting a metal work piece along with a filler metal to form a strong joint.
What is Welding?
Coalescence occurs when two metals seem to pull together, or grow into one body, of the base metal parts when there is the slightest contact. There are two basic requirements for coalescence: heat and intimacy of contact.
Heat: Welding processes differ depending on the source of heat, the manner in which heat is applied or generated, and the intensity of the heat. The fuel used as a heat force may be:
acetylene or hydrogen in air or in oxygen;
an electric arc;
an electric, gas, or oil furnace;
the resistance of metal to the flow of electric current; or
a chemical reaction between a metal oxide and finely divided aluminum.
The intensity of heat applied or generated at the joint varies according to the metals being joined and to the welding process being used. All welding processes, except brazing, use temperatures high enough to melt the base metals. However, all welding, cutting, and brazing processes generate enough heat to seriously injure workers.
Intimacy of Contact: The second basic requirement for coalescence, intimacy of contact, is accomplished in two ways: pressure processes and non-pressure processes. In pressure processes, there is no space between the surfaces being joined. Welders apply pressure while the contact surfaces are at a high enough temperature to allow plastic flow of the metal. In non-pressure processes, the space between the joined surfaces is filled with molten metal.
Oxyacetylene Welding/Cutting
Oxyacetylene welding or cutting is also called torch or gas welding or cutting. Two metals are joined by melting or fusing their adjoining surfaces in the process. This is done by directing a flame from burning gas (usually acetylene) to melt metal at a joint to be welded, and is a common method for welding iron, steel, cast iron, and copper.
Oxyacetylene Cylinders: Oxyacetylene equipment consists of a cylinder of acetylene, a cylinder of oxygen, two regulators, two lengths of hose with fittings, a welding torch with tips, and either a cutting attachment or a separate cutting torch.
Accessories include a friction igniter to light the torch, an apparatus wrench to fit the various connections on the regulators, the cylinders, and the torches; goggles with filter lenses for eye protection; and gloves for protection of the hands. Flame-resistant clothing is worn when necessary.
Regulators: Reduce the gas pressure in a cylinder to a suitable working pressure before it can be used. This is done by a regulator or reducing valve. Regulators are either the single-stage or the double-stage type:
Single-stage regulators reduce the pressure of the gas in one step;
two-stage regulators do the same job in two steps or stages. Less adjustment is generally necessary when two-stage regulators are used.
Acetylene regulators and oxygen regulators are of the same general type, although those designed for acetylene are not made to withstand such high pressures as are those designed for use with oxygen cylinders.
Welding Torches: The oxyacetylene welding torch is used to mix oxygen and acetylene gas in the proper proportions and to control the volume of these gases burned at the welding tip.
Torches have two needle valves, one for adjusting the flow of oxygen and the other for adjusting the flow of acetylene.
They have a handle (body), two tubes (one for oxygen and one for acetylene), a mixing head, and a tip.
Welding tips are made from a special copper alloy, which dissipates heat (less than 60 percent copper), and are available in different sizes to handle a wide range of plate thicknesses.
Hoses: Hoses used to make the connection between a torch and a regulator are strong, nonporous, and flexible and light enough to make torch movements easy. It is made to withstand high internal pressures, and the rubber used in its manufacture is specially treated to remove sulfur to avoid the danger of spontaneous combustion.
The hoses used for acetylene and oxygen are the same in grade, but they differ in color and have different types of threads on the hose fittings. The color codes are as follows:
The oxygen hose is GREEN.
The acetylene hose is RED.
For added protection against mixing of the hoses during connection:
The oxygen hose has right-hand threads and the acetylene hose has left-hand threads.
The acetylene fittings have a notch that goes around the circumference of the fittings for an additional identification factor.
Arc welding is the process in which fusion is produced by heating with an electric arc that is generated between an electrode and the surface of the base metal.
Arc cutting is the process in which the cutting or removal of metals is done by melting with the heat of an arc between an electrode and base metal.
In electric welding, electrodes form a part of the electrical circuit. In gas tungsten arc welding, electrodes melt off and are a source of the filler metal supply.
Solid Electrodes- These electrodes are consumable (composed of steel, copper, aluminum, various alloys, and other metals) or non-consumable (primarily tungsten). They produce less fumes, compared with flux-cored wire or coated electrodes.
Covered and Coated Electrodes- These are the largest group of electrodes used in welding. The covering provides the flux from the weld. Major metals from the coatings include fluoride, nickel, iron, chromium, manganese, copper, and molybdenum.
Overexposure to these substances can cause injury and illness over the long-term.
Brazing is a welding process using nonferrous filler alloys that do not contain iron or steel and have a melting point above 840°F but below that of the base metal. Brazing is also called ‘hard soldering’ or ‘silver soldering.
Brazing is the only welding process in which the melting of the base metal is not necessary for coalescence. Coalescence occurs when two metals seem to pull together, or grow into one body, of the base metal parts when there is the slightest contact. Click here for more information on brazing alloys.
Soldering
Soldering is a joining process using non-ferrous filler alloys. Soft soldering uses alloys that melt between 190°F to 840°F and is used in electronics, plumbing, and joining sheet metal parts. Soldering is not considered a welding process. Lead and tin are common alloys used in soldering, but there is also less common lead-free solder to decrease environmental impacts.
Defects in welds can cause unforeseen injuries and accidents. Common weld defects to be familiar with to ensure your safety include:
Incomplete fusion: Incomplete fusion occurs when the weld fails to fuse one side of the joint in the root. The most common type of incomplete fusion is overlap.
Inadequate joint and root penetration: Inadequate joint and root penetration is cause for rejection of a weld even if it is sound in all other respects. The strength required in a weldment is achieved only when the specified joint and root penetration is achieved.
Spatter: Spatter is the term used to describe metal particles or globules expelled during welding and that do not form part of the weld. When spatter occurs, small balls of metal are stuck to the surface of the base metal along the line of weld.
Overlap: Overlap is a protrusion of the weld metal beyond the bond at the toe of the weld. This is the most common type of incomplete fusion.
Undercut: An undercut is a groove melted into the base metal adjacent to the toe and not filled with weld metal.
Root cracks: Root cracks are similar to toe cracks except that they occur at the root of the weld. Root cracks may be in the weld metal or in the base metal.
Toe cracks: Toe cracks occur in the base metal, at the toe of the weld.
Crater cracks: One common kind of crack is the crater crack. This occurs in the crater or depression at the termination of a weld bead in gas or arc welding.
Underbead cracks: Underbead cracks occur in the heat-affected zone underneath a bead and do not extend to the surface of the metal.
Voids: Voids, also called gas pockets or blow holes, occur as the result of gas being absorbed during the welding and then trapped as the metal solidifies.
Inclusions: Slag inclusion is the term used to describe the weld defect in which non-metallic solid material is trapped in the weld metal or at the bond between the weld metal and the base metal.
Welding Hazards
Protecting yourself when performing welding operations depends on your understanding of the hazards involved and the proper way to control them. Controlling welding hazards includes avoiding eye injury, respiratory protection, ventilation of the work area, protective clothing, and having safe equipment to use.
Gas Welding Hazards
Since gas welding is slower and easier to control than electric arc welding, it is commonly used in general maintenance work, brazing, and soldering.
Equipment: Oxyacetylene equipment consists of a cylinder of acetylene, a cylinder of oxygen, two regulators, two lengths of hose with fittings, a welding torch with tips, and either a cutting attachment or a separate cutting torch. Accessories include a friction igniter to light the torch, an apparatus wrench to fit the various connections on the regulators, the cylinders, and the torches; goggles with filter lenses for eye protection; and gloves for protection of the hands. Flame-resistant clothing is worn when necessary.
Acetylene (chemical formula C2H2): a fuel gas made up of carbon and hydrogen. When burned with oxygen, acetylene produces a very hot flame, having a temperature between 5700°F and 6300°F. Acetylene gas is colorless, but has a distinct, easily recognized odor.
MAPP (methylacetylene-propadiene) gas: an all-purpose industrial fuel that has the high flame temperature of acetylene and the handling characteristics of propane.
MAPP is not sensitive to shock and nonflammable in the absence of oxygen. There is no chance of an explosion if a cylinder is bumped, jarred, or dropped. The cylinders may be stored or transported in any position with no danger of an explosive air pocket being formed.
MAPP toxicity is rated “very slight,” but high concentrations (5,000 ppm) may have an anesthetic effect. Local eye or skin contact with MAPP gas vapor causes no adverse effect. However, the liquid fuel will cause dangerous frostlike burns due to the temperature at which MAPP gas should be stored.
Oxygen: a colorless, tasteless, odorless gas that is slightly heavier than air. Oxygen will not burn by itself, but it will support combustion when combined with other gases.
Take extreme care to ensure compressed oxygen does not become contaminated with hydrogen or hydrocarbon gases or liquids.
A highly explosive mixture will be formed if uncontrolled compressed oxygen becomes contaminated. Oxygen should NEVER come in contact with oil or grease.
Oxygen cylinders are supplied in several sizes. The size most commonly used 9 1/8 inches in diameter, weighs about 145 pounds, and has a capacity of 200 cubic feet. At 70°F, the gas is under a pressure of 1800 psi.
Safe procedures and practices must always be used when working around or with arc welding equipment to avoid being injured.
Avoid the following hazards in arc welding:
radiation from the arc, in the form of ultraviolet and infrared rays
flying sparks and globules of molten metal
electric shock
metal fumes
burns
Radiation: Radiation from the arc is hazardous to the eyes. Eyes should be protected from radiation from the arc by use of an arc welding helmet or face shield with approved lenses.
Cover the face, hands, arms, and other skin surfaces to prevent exposure to the radiation.
Gloves should be worn and other parts of the body covered by clothing of sufficient weight to shut out the rays of the arc.
Without proper clothing, burns comparable to sunburn will result.
Arc Flash: When possible, shield arc-welding operations so no one may accidentally look directly at the arc or have it shine or reflect into his or her eyes.
An arc “flash” may cause a person to be temporarily blinded.
The severity of an arc flash and the time it will take to recover varies with the length of time a person was exposed to the arc.
Long exposure has been known to cause permanent damage to the retina of the eye.
If someone is severely “flashed,” medical personnel should provide special treatment at once.
Electric Shock: Avoid the possibility of dangerous electric shock by using insulated electrode holders and wearing dry leathers and gloves.
When possible, avoid using arc-welding equipment in wet or damp areas.
Perform arc-welding only in an area that is well-ventilated.
Flying sparks: usually accompany arc welding. These present a hazard if they strike unprotected skin, lodge on flammable clothing, or hit any other flammable material.
When arc welding, wear suitable weight clothing and cuffless trousers.
Cover pockets so they will not collect sparks, and remove any flammable materials, such as matches, plastic combs, or gas lighters.
Wear the proper foot protection. Wear high top boots with steel toes.
Hot Metal and Burns: Hot metal and flying sparks have the potential to cause serious burns. Never handle it with bare hands until it has cooled naturally or has been quenched in the quenching tank.
Be sure to use leather gloves with tight fitting cuffs that fit over the sleeves of the jacket. Many welders wear a full set of leathers that consists of the following:
jacket or set of sleeves
gauntlet gloves
leggings
spats
apron
welders hat liner
In gas welding, the high temperatures of the welding flame and the sparks will burn skin. Gas welding can also cause radiation burns due to infrared rays emitted by the red-hot material. Wear flame-resistant or flame-retardant clothing and hair protection at all times.
Gases and Fumes: Fluxes used in certain welding and brazing processes produce vapors that are irritating to the eyes, nose, throat, and lungs. Welding fumes and gases generally come from the following sources:
base material being welded or the filler material used
coatings and paints on the metal or electrode coatings;
shielding gases supplied from cylinders;
chemical reactions due to ultraviolet light of the arc and heat; and
contaminants in the air from cleaners and degreasers.
Perform welding in a well-ventilated area and always wear approved safety goggles. Here are a few options:
The darkest shade of the goggles that still show a clear outline of the work without producing eyestrain is recommended.
Sunglasses are not adequate.
Have you ever tested your knowledge on safe welding? Do so at the welding safety quiz I have available here
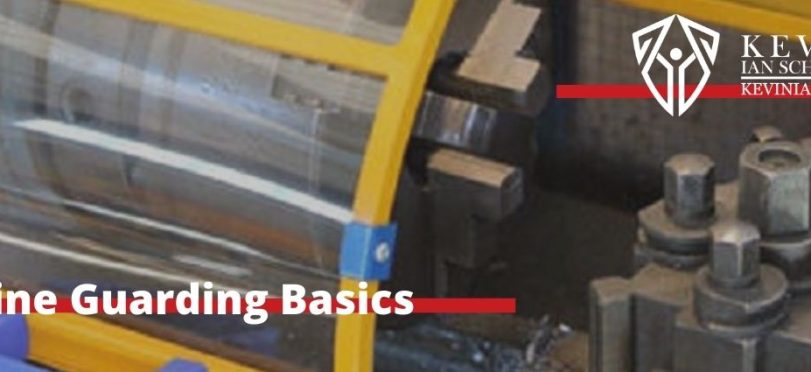
Moving machine parts have the potential to cause severe workplace injuries, such as crushed fingers or hands, amputations, burns, or blindness.
Amputations, lacerations, and abrasions are costly and have the potential to increase workers’ compensation premiums.(Amputation is one of the most severe and crippling types of injuries in the occupational workplace, often resulting in permanent disability.) Due to this fact, OSHA (Occupational Safety & Health Administration) has established a set of standards around machine guarding.
The purpose of machine guarding is to protect the machine operator and other employees in the work area from hazards created during the machine’s normal operation.
Many companies adopt three basic practices when it comes to machine guarding in the workplace:
Safeguard the point of operation – the point of operation must be guarded to protect the operator from injury – OSHA 1910.212
All operators of production equipment must be properly trained on the equipment they will be working on.
Implant the value, and apply the best safety practices, for safety for all employees at all times.
Based upon the point of safeguarding the point of operation, OSHA mandates that there be at least one type of guarding mechanism in place. The purpose of this guarding is to:
Prevent contact with areas of the device that could cause injury
Secure the device (and the machine guard) so that certain parts cannot be manipulated or tampered with by personnel
Protect against splatter or falling debris while using the machine during normal operation or during maintenance
Avoid causing additional hazards as a result of the machine guard installation such as sharp edges or pinching mechanisms
Allow easy operation of the machine without interfering with productivity or efficient use of the device
Employees require training in the need and value of machine guards, as well as how to work with them in place, how to remove them for maintenance, and what to do if they break or go missing.
Machine guarding can only provide protection if the people operating, maintaining and working near the equipment are properly trained and understand how it works. OSHA identifies several factors for a thorough documentation and training program, including:
Identifying each of the physical guards and/or devices and defining which hazards they protect against and how.
How to appropriately use the safeguards.
Who can remove the safeguards and why (maintenance, repair, etc.).
Protocol when a guard is missing, damaged or malfunctioning.
Any PPE when required. If you need any additional information on PPE, check out this guide.
Unlike many other regulations, OSHA offers guidelines for the training expectations here. Do not assume this training is all that is required, it is a guideline for training., not a substitute for training.
When training employees emphasize that physical machine guards fall within 4 categories:
Fixed guards – designed as a permanent part of the device, these guards are sturdy and should not be removed or manipulated
Interlocked guards – when used these guards will disable or pause machine operations whenever they are raised, opened or removed
Adjustable guards – when a device needs protection but also needs to be adaptable to certain heights or angles, this type of guard is utilized and can be manually changed depending on the worker or the type of use
Self-adjusting guards – automatically adjusting guards are helpful for machines where operations require movement, such as trimming certain types of wood for furniture
Machine guarding should be routinely inspected to make sure all devices have the proper protection in place. If any machine guard breaks, cracks, or is damaged in any way there should be a priority action to address the issue. Often it is best to completely replace the guard versus a repair because the structural integrity of the guard could be compromised.
Employee buy-in for machine guarding is also critical. Getting upfront input from the key people operating your equipment is vital as you look to update or enhance guarding to ensure solutions that are both safe and have a good dose of common sense attached. Going forward, guarding should be an integral part of your training.
Download our overview of machine guarding training below
Read our overview of machine guarding training below
The safe use of mobile ground ladders is often overlooked, as many employers assume employees know how to use them, since it is equipment used in most households. Any assumption when it comes to safety is a potential hazard.
A ground ladder safety policy sets expectations of use for employees, in the safe operation of the equipment in the workplace.
A policy on ground ladder safety should set expectations of what sort of ladders are used in the workplace, how to safely use the ladders, and inspection requirements.
Ground ladders require special inspections and care for use.
Even if they don’t regularly use ladder , especially if not regularly, employees should be trained on how to inspect ground ladders using the checklist attached to the policy as part of their pre-use inspection.
Pre-Work:
Before starting your project, you should check to make sure you’re using the right ladder for the job. There are a few different types of ladders (extension/straight, fixed access, tripod orchard, and stepladder), but if you’re completing household tasks, like putting up lights or clearing gutters, you’ll likely be using either a straight ladder or stepladder depending on the height.
Regardless of the ladder you’re using, be sure to check the load rating. The load rating needs to cover your weight AND the weight of your tools. You should also consider the material that your ladder is made of and whether it’s appropriate for your intended use. Aluminum and steel ladders conduct heat and electricity and should never be used for electrical work. Fiberglass and wood ladders are suitable for electrical work, but wood ladders are especially vulnerable to damage and decay. No matter what type of ladder you’re using, you should always inspect it, check for cracks, and ensure the frame, rungs, and feet are not compromised.
During Work:
When placing your ladder, make sure that the footing is on a firm, non-slip surface that is clear of any debris or hazards. You can also reduce the risk of a fall by wearing non-slip shoes and gloves. If you have to adjust the placement of the ladder, avoid pushing or pulling it from the sides – repeated sideways movement can make ladders wobbly since they are weaker in those directions. When you’re using any type of portable ladder, use the 4:1 ratio: for every four feet you go up, the ladder should be placed one foot out.
You should always face the stepladder when climbing up or down and maintain a firm grip with both hands. You have climbed too high if your knees are above top of the stepladder or if you cannot maintain a handhold on the ladder – and never stand on the top rung or step. Before you climb, always look up for powerlines and other overhead hazards and adjust the placement of your ladder if needed.
Post-Work:
Taking care of your ladder is important to ensure that it remains in good condition and useable for your next project. After each use, you should clean your ladder and ensure that any moving parts are well lubricated. Inspect for damage such as broken rungs, split side rails, worn or broken safety feet, and oil or grease which can make climbing surfaces slippery.
If your ladder is damaged, don’t try to repair it yourself. DIY repairs, such as tying or binding with wire, or painting over damaged areas, are not safe in the long-term and can hide cracks and weak points.
To take good care of your ladder, be sure to store it inside on horizontal racks with support every 2 meters. Protect yourself and others when your ladder is stored by fixing it to the wall or racks so that it doesn’t fall or present other hazards.
Monthly inspections:
Every month, ladders should be thoroughly inspected and certified for use. This is often done off a large inspection sheet, or sometimes on a tag attached to the ladder, like with fire extinguishers.
When using a ladder, always be mindful of your individual circumstances as well. Do not use a ladder if you are affected by medication or a health condition that affects your balance. Before you start your project, always make sure that you have a plan in the case of an accident, and never use a ladder if you are working alone and cannot get help easily.
When a ladder is identified as damaged, a full checklist should be filled out to document the ladder damage prior to removal from use. When removing a ladder from service, it should be destroyed to ensure it is not accidentally placed back into service.
Providing a common and coherent approach to classifying chemicals and communicating hazard information on labels and safety data sheets;
Improving the quality and consistency of hazard information in the workplace;
Helping reduce trade barriers;
Productivity improvements for American businesses that regularly handle, store, and use classified hazardous chemicals;
Providing cost savings for American businesses that periodically update safety data sheets and labels for classified chemicals.
Historical note: The old HCS 1994 gave workers the right to know, but the HCS 2012 gives workers the right to understand: this is a very important change in OSHA’s approach.
OSHA has defined the term “substances” as chemical elements and their compounds in the natural state or obtained by any production process, including any additive necessary to preserve the stability of the product and any impurities deriving from the process used, but excluding any solvent which may be separated without affecting the stability of the substance or changing its composition.
For the purposes of the HCS, a hazardous chemical means any chemical which is classified as a physical hazard or a health hazard, a simple asphyxiant, combustible dust, pyrophoric gas, or hazard not otherwise classified.
Physical hazards – a chemical that is classified as posing one of the following hazardous effects:
The HCS 2012 requires GHS pictograms on labels to alert users of the chemical hazards to which they may be exposed. Each pictogram consists of a symbol on a white background framed within a red border and represents a distinct hazard(s). The pictogram on the label is determined by the chemical hazard classification.
While the GHS uses a total of nine pictograms, OSHA will only enforce the use of eight. The environmental pictogram is not mandatory but may be used to provide additional information. Workers may see the ninth symbol on a label because label preparers may choose to add the environment pictogram as supplementary information.
Under the HCS 2012, labels on containers shipped from manufacturers or distributors must be labeled, tagged or marked with the following six items:
Product Identifier – This should include the chemical identity of the substance.
Signal word – Signal words used in GHS are “Danger” and “Warning.” Danger is for the more severe hazard categories.
Hazard Statements – This is a phrase assigned to a hazard class and category that describes the nature of the hazards of a hazardous product, and the degree of the hazard.
Pictograms – These include symbols plus other elements, such as a border, background pattern or color that conveys specific information.
Precautionary statements – These are phrases (and/or pictograms) that describe the recommended measures to minimize or prevent adverse effects resulting from exposure to a hazardous product.
Supplier identification – This contains the name, address, and telephone number of the manufacturer or supplier of the substance or mixture.
The employer must educate and train exposed employees on classified workplace chemicals.
Employees must receive information and training that ensures their awareness of the chemical hazards used in their work area. Employers must provide this information when an employee is initially assigned to a work area where hazardous chemicals are present and before assignments involving new exposure situations.
any operations in their work area where hazardous chemicals are present
the location and availability of the written hazard communication program (including the required list(s) of hazardous chemicals and SDSs required by the HCS)
To make sure all training requirements are met, it is recommended to review each section of the SDS. Group discussion and examples can be effective training strategies to make the training more interesting to students. Demonstrating and practicing the use of PPE for properly using and cleaning up spills is especially important.
Methods and observations that may be used to detect the presence or release of a hazardous chemical in the work area.
The physical hazard, health hazards, simple asphyxiation, combustible dust, and pyrophoric gas hazards, as well as hazards not otherwise classified, of the chemicals in the work area.
The measures employees can take to protect themselves from these hazards, including specific procedures the employer has implemented to protect employees from exposure to hazardous chemicals, such as appropriate work practices, emergency procedures, and personal protective equipment to be used.
The details of the hazard communication program developed by the employer, including an explanation of the labels received on shipped containers and the workplace labeling system used by their employer; the safety data sheet, including the order of information and how employees can obtain and use the appropriate hazard information.
View and download the GHS Training for Supervisors
The Hazard Communication Standard of 2012 requires chemical manufacturers, distributors, or importers to provide Safety Data Sheets (SDSs) (formerly MSDSs or Material Safety Data Sheets) for each hazardous chemical to downstream users to communicate information on these hazards. SDSs are required to be presented in a consistent user-friendly, 16-section format. We will discuss this format in this module.
The SDS includes information such as:
the properties of each chemical;
the physical, health, and environmental health hazards;
protective measures; and
safety precautions for handling, storing, and transporting the chemical.
The information contained in the SDS must be in English (although it may be in other languages as well). OSHA requires that SDS preparers provide specific minimum information as detailed in Appendix D of 29 CFR 1910.1200. The SDS preparers may also include additional information in various section(s). Employers must ensure that SDSs are readily accessible to employees.
SDS Form Explained
The HCS 2012 requires new SDSs to be in a uniform format, and include the section numbers, the headings, and associated information under the headings below.
Section 1: Identification – This section identifies the chemical on the SDS as well as the recommended uses. It also provides the essential contact information of the supplier. The required information consists of:
Product identifier used on the label and any other common names or synonyms by which the substance is known.
Name, address, phone number of the manufacturer, importer, or other responsible party, and emergency phone number.
Recommended use of the chemical (e.g., a brief description of what it actually does, such as flame retardant) and any restrictions on use (including recommendations given by the supplier).
Section 2: Hazard(s) Identification – This section identifies the hazards of the chemical presented on the SDS and the appropriate warning information associated with those hazards. The required information consists of:
hazard classification of the chemical (e.g., flammable liquid, category 1)
signal word, pictograms
hazard statement(s), precautionary statement(s)
description of any hazards not otherwise classified
Section 3: Composition/Information on Ingredients – This section identifies the ingredient(s) contained in the product indicated on the SDS, including impurities and stabilizing additives. This section includes information on substances, mixtures, and all chemicals where a trade secret is claimed. The required information consists of:
Substances – Chemical name; Common name and synonyms; Chemical Abstracts Service (CAS) number and other unique identifiers; Impurities and stabilizing additives, which are themselves classified and which contribute to the classification of the chemical.
Mixtures – Same information required for substances; chemical name and concentration (i.e., exact percentage) of all ingredients which are classified as health hazards and are present above their cut-off/concentration limits or a health risk below the cut-off/concentration limits. The concentration (exact percentages) of each ingredient.
Chemicals where a trade secret is claimed – A statement that the specific chemical identity and/or exact percentage (concentration) of composition has been withheld as a trade secret is required.
Section 4: First-Aid Measures – This section describes the initial care that should be given by untrained responders to an individual who has been exposed to the chemical. The required information consists of:
necessary first-aid instructions by relevant routes of exposure (inhalation, skin and eye contact, and ingestion)
description of the most important symptoms or effects, and any symptoms that are acute or delayed
recommendations for immediate medical care and special treatment needed, when necessary
Section 5: Fire-Fighting Measures – This section provides recommendations for fighting a fire caused by the chemical. The required information consists of:
Recommendations of suitable extinguishing equipment, and information about extinguishing equipment that is not appropriate for a particular situation.
Advice on specific hazards that develop from the chemical during the fire, such as any hazardous combustion products created when the chemical burns.
Recommendations on special protective equipment or precautions for firefighters.
Section 6: Accidental Release Measures – This section provides recommendations on the appropriate response to spills, leaks, or releases, including containment and cleanup practices to prevent or minimize exposure to people, properties, or the environment. The required information may consist of recommendations for:
Use of personal precautions and protective equipment to prevent the contamination of skin, eyes, and clothing.
Emergency procedures, including instructions for evacuations, consulting experts when needed, and appropriate protective clothing.
Methods and materials used for containment.
Cleanup procedures.
Section 7: Handling and Storage – This section provides guidance on the safe handling practices and conditions for safe storage of chemicals. The required information consists of:
Precautions for safe handling, including recommendations for handling incompatible chemicals, minimizing the release of the chemical into the environment, and providing advice on general hygiene practices.
Recommendations on the conditions for safe storage, including any incompatibilities. Provide advice on specific storage requirements (e.g., ventilation requirements).
Section 8: Exposure Controls/Personal Protection – This section indicates the exposure limits, engineering controls, and personal protective measures that can be used to minimize worker exposure. The required information consists of:
OSHA Permissible Exposure Limits (PELs), American Conference of Governmental Industrial Hygienists (ACGIH) Threshold Limit Values (TLVs), and any other exposure limits
appropriate engineering controls
recommendations for personal protective measures to prevent illness or injury from exposure to chemicals, such as personal protective equipment (PPE)
any special requirements for PPE, protective clothing or respirators
Section 9: Physical and Chemical Properties – This section identifies physical and chemical properties associated with the substance or mixture. The minimum required information consists of:
Appearance (physical state, color etc.)
Upper/Lower flammability or explosive units
Odor
Vapor pressure
Odor threshold
Vapor density
pH
Relative density
Melting/freezing point
Solubility(ies)
Initial boiling point & boiling range
Flash point
Evaporation rate
Flammability (solid, gas)
Partition coefficient: noctonol/water
Auto-ignition temperature
Viscosity
Section 10: Stability and Reactivity – This section describes the reactivity hazards of the chemical and the chemical stability information. This section is broken into three parts: reactivity, chemical stability, and other. The required information consists of:
Reactivity – Description of the specific test data for the chemical(s).
Chemical stability – Indication of whether the chemical is stable or unstable under normal temperature and conditions. Description of any stabilizers. Indication of any safety issues should the product change in physical appearance.
Other – Indication of the possibility of hazardous reactions and conditions under which hazardous reactions may occur. List of all conditions that should be avoided. List of all classes of incompatible materials. List of any known or anticipated hazardous decomposition products.
Section 11: Toxicological Information – This section identifies toxicological and health effects information or indicates that such data are not available. The required information consists of:
Information on the likely routes of exposure. The SDS should indicate if the information is unknown.
Description of the delayed, immediate, or chronic effects from short- and long-term exposure.
The numerical measures of toxicity – the estimated amount of a substance expected to kill 50% of test animals in a single dose (LD50).
Description of the symptoms. This description includes the symptoms associated with exposure to the chemical including symptoms from the lowest to the most severe exposure.
Indication of whether the chemical is a potential carcinogen.
Sections 12-15 – Note: Since other Agencies regulate this information, OSHA does not enforce Sections 12 through 15.
Section 16: Other Information – This section indicates when the SDS was prepared or when the last known revision was made. The SDS may also state where the changes have been made to the previous version. You may wish to contact the supplier for an explanation of the changes. Other useful information also may be included here.
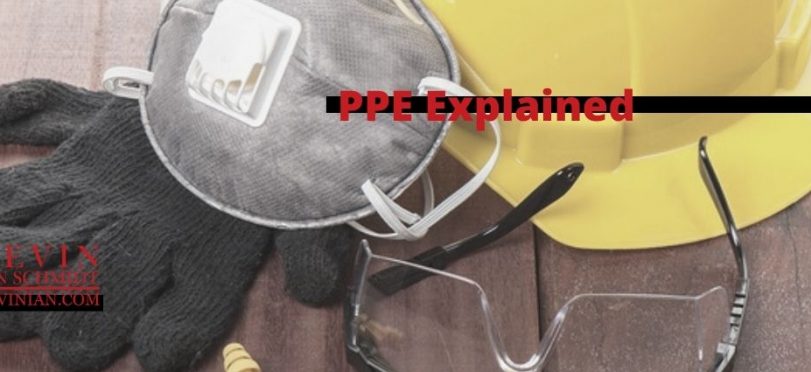
OSHA standards require the use of PPE to reduce employee exposure to hazards when engineering and administrative controls are not feasible or effective in reducing these exposures to acceptable levels. Employers are required to determine if PPE should be used to protect their workers and they must also make sure employees use and maintain PPE in a sanitary and reliable condition.
Employer Responsibilities
In general, employers are responsible for:
performing a “hazard assessment” of the workplace to identify and control physical and health hazards;
identifying and providing appropriate PPE for employees;
training employees in the use and care of the PPE;
maintaining and replacing worn or damaged PPE; and
periodically reviewing, updating and evaluating the effectiveness of the PPE program
Employee Responsibilities
In general, employees should be:
properly wearing PPE,
attending training sessions on PPE,
caring for, cleaning, and maintaining PPE, and
informing a supervisor of the need to repair or replace PPE
Defective or damaged personal protective equipment must not be used. It’s important to inspect PPE regularly, and before each use, to make sure it’s capable of adequately protecting an employee from exposure to hazards. Remember, PPE that is defective is not PPE.
Do employers have to pay for PPE?
With few exceptions, OSHA requires employers to pay for personal protective equipment used to comply with OSHA standards.
Employers cannot require workers to provide their own PPE. Employees who use their own PPE must do so voluntarily. Even if an employee provides his or her own PPE, the employer must still ensure the equipment is adequate to protect the worker from hazards at the workplace.
Employers must pay for the following:
metatarsal foot protection
rubber boots with steel toes
non-prescription eye protection
prescription eyewear inserts/lenses for full face respirators
goggles and face shields
firefighting PPE (helmet, gloves, boots, proximity suits, full gear)
hard hats
hearing protection
welding PPE
Payment Exceptions under the OSHA Rule
Employers are not required to pay for some PPE in certain circumstances:
Non-specialty safety-toe protective footwear (including steel-toe shoes or boots) and non-specialty prescription safety eyewear provided that the employer permits such items to be worn off the job site. OSHA based this decision on the fact that this type of equipment is very personal, is often used outside the workplace, and that it is taken by workers from jobsite to jobsite and employer to employer.
Everyday clothing, such as long-sleeve shirts, long pants, street shoes, and normal work boots.
Ordinary clothing, skin creams, or other items, used solely for protection from weather, such as winter coats, jackets, gloves, parkas, rubber boots, hats, raincoats, ordinary sunglasses, and sunscreen.
Lifting belts because their value in protecting the back is questionable.
When the employee has lost or intentionally damaged the PPE and it must be replaced.
How does an employer select PPE?
To help determine the best PPE for the job, conduct a hazard assessment of each employee’s task, the likelihood that the employee would be injured without PPE, and the severity of a potential injury. For example:
The task: A worker uses a plasma cutter to remove the bottom of a 55-gallon drum that contains traces of motor oil. His only PPE is a pair of synthetic gloves. The outcome: The drum explodes and the worker receives severe burns on his face and hands. An effective PPE hazard assessment would produce the following information:
Task: Using a plasma cutter.
Hazards: The plasma-cutting arc produces hot metal and sparks, especially during the initial piercing of the metal. It also heats the work piece and the cutting torch. Never cut closed or pressurized containers such as tanks or drums, which could explode. Do not cut containers that may have held combustibles or toxic or reactive materials unless they have been cleaned, tested, and declared safe by a qualified person.
Likelihood of injury without PPE: High
Severity of a potential injury: Life-threatening burns PPE necessary for the task:
Body: dry, clean clothing made from tightly woven material such as leather, wool, or heavy denim
Eyes and face: safety glasses with side shield or face shield; welding helmet with shaded eye protection for welding tasks
The PPE standard mandates the employer must provide “hands-on-how-to” (practice) training to each employee who is required to use Personal Protective Equipment. To meet the minimum training requirements, each employee receiving PPE training must be trained to know at least the following:
when PPE is necessary;
what PPE is necessary;
how to properly don, doff, adjust, and wear PPE;
the limitations of the PPE; and
the proper care, maintenance, useful life, and disposal of the PPE.
So far, we meet minimum OSHA requirements… but one very important element is missing: The PPE standard does not specifically require education on “why” PPE is necessary.
So, why is this element so important? Because study after study tells us the most common reason employees don’t follow rules in the workplace is because they don’t know why the rules are important.
Types of PPE
Protective eye and face devices must comply with ANZI Z87.1, “American National Standard Practice for Occupational and Educational Eye and Face Protection,” and OSHA Standard 1910.133, Eye and Face Protection.
Eye and Face Protection
Glasses
Protective eyeglasses or spectacles are made with safety frames, tempered glass or plastic lenses, temples and side shields which provide eye protection from moderate impact and particles encountered in job tasks such as carpentry, woodworking, grinding, scaling, etc. Safety glasses are also available in prescription form for those persons who need corrective lenses.
Goggles
Vinyl-framed goggles of soft pliable body design provide adequate eye protection from many hazards. These goggles are available with clear or tinted lenses, perforated, port vented, or non-vented frames.
Single-lens goggles provide similar protection to spectacles and may be worn in combination with spectacles or corrective lenses to ensure protection along with proper vision.
Welders goggles provide protection from sparking, scaling, or splashing metals and harmful light rays. Lenses are impact resistant and are available in graduated shades of filtration.
Chipper/Grinder goggles provide eye protection from flying particles. The dual protective eye cups house impact resistant clear lenses with individual cover plates.
Face Shields
These normally consist of an adjustable headgear and face shield of tinted/transparent acetate or polycarbonate materials, or wire screen. Face shields are available in various sizes, tensile strength, impact/heat resistance and light ray filtering capacity.
Face shields will be used in operations when the entire face needs protection and should be worn to protect eyes and face against flying particles, metal sparks, and chemical/biological splash.
Welding Shields
These shield assemblies consist of:
vulcanized fiber or glass fiber body
a ratchet/button type adjustable headgear or cap attachment
a filter and cover plate holder
These shields will be provided to protect workers’ eyes and face from infrared and ultraviolet light burns to the retina, flying sparks, metal spatter, and slag chips encountered during:
To understand how respirators can be used to protect employees, it is important to understand what a respirator is and what it is not. A respirator protects against respiratory hazards by removing specific air contaminants from the ambient (surrounding) air or by supplying breathable air from a safe source.
Air-purifying respirators: Respirators that remove contaminants from the ambient air are called air-purifying respirators. Particulate respirators are a type of air-purifying respirator. The part of a respirator that forms a protective barrier between the user’s respiratory tract and air contaminants is called an inlet covering. Most inlet coverings are classified as either tight-fitting or loose-fitting.
Tight-fitting respirator: A tight-fitting respirator has an inlet covering, also called a face piece or mask, designed to form a seal with the face of the wearer. It is available in three types: quarter mask, half mask, and full face piece.
Loose-fitting respirator: A loose-fitting respirator has an inlet covering that typically covers the user’s head and may extend over the shoulders. It is designed to form a partial seal with the face. These include loose-fitting face pieces, as well as hoods, helmets, or full suits, all of which cover the head completely.
Atmosphere-supplying respirators: Respirators that supply air from a safe source other than the ambient air are called atmosphere-supplying respirators. There are two types of atmosphere-supplying respirators: Supplied-Air Respirators (SARs) and Self-Contained Breathing Apparatus (SCBA).
Head Protection
There are primarily two situations when employees must wear protective helmets.
1. Falling Objects
When there is a potential in the workplace for injury to the head from falling objects, the employer must make sure that each affected employee wears a protective helmet.
Some examples of work that might require helmets to protect from falling objects include:
working below other workers who are using tools and materials which could fall;
working around or under conveyor belts which are carrying parts or materials; and
working below machinery or processes which might cause material or objects to fall.
Some examples of occupations for which head protection should be routinely considered are:
carpenters
electricians
linemen
mechanics and repairers
plumbers and pipe fitters
assemblers
packers
wrappers
sawyers
welders
laborers
freight handlers
timber cutting and logging
stock handlers
Types of Head Protection:
Type I: A helmet of Type I is designed to provide protection only to the top of the head. It is not intended to provide impact from side impacts. (This is by far the most commonly used type of hard hat in use.
Type II: A helmet of Type II is designed to provide protection against both top and side impacts.
Bump Caps: Bump caps/skull guards should be issued and worn for protection against scalp lacerations from contact with sharp objects. However, it’s very important to understand that they must not be worn as substitutes for safety caps/hats because they do not provide protection from impact forces or penetration by falling objects.
Hand Protection
Make sure safety gloves are the correct type for the specific substance.
It’s important that employers select and require employees to use appropriate hand protection when exposed to any of the hazards listed below:
hazardous chemicals that can cause burns, rashes, and internal injury;
cuts or lacerations;
abrasions;
punctures;
thermal burns; and
harmful temperature extremes.
Glove Guidelines
Disposable Gloves: Disposable gloves, usually made of light-weight plastic, can help guard against mild irritants.
Fabric Gloves: These gloves are made of cotton or fabric blends. They’re generally used to improve grip when handling slippery objects. They also help insulate hands from mild heat or cold.
Leather Gloves: These gloves are used to guard against injuries from sparks or scraping against rough surfaces. They are also used in combination with an insulated liner when working with electricity.
Metal Mesh Gloves: These gloves are used to protect hands from accidental cuts and scratches. They are used most commonly by persons working with cutting tools or other sharp instruments.
Aluminized Gloves: These gloves made of aluminized fabric are designed to insulate hands from intense heat. These gloves are most commonly used by persons working with molten materials.
Chemical Resistance Gloves: These gloves may be made of rubber, neoprene, polyvinyl alcohol or vinyl, etc. The gloves protect hands from corrosives, oils, and solvents. When selecting chemical resistance gloves, be sure to consult the manufacturer’s recommendations, especially if the gloved hand will be immersed in the chemical.
CHEMICAL Protection Glove Selection Chart.
Type
Advantages
Disadvantages
Use Against
Natural rubber
Low cost, good physical properties, dexterity
Poor vs. oils, greases, organics. Frequently imported; may be poor quality
Bases, alcohols, dilute water solutions; fair vs. aldehydes, ketones.
Natural rubber blends
Low cost, dexterity, better chemical resistance than natural rubber vs. some chemicals
Physical properties frequently inferior to natural rubber
Same as natural rubber
Polyvinyl chloride (PVC)
Low cost, very good physical properties, medium cost, medium chemical resistance
Plasticizers can be stripped; frequently imported; may be poor quality
Strong acids and bases, salts, other water solutions, alcohols
Neoprene
Medium cost, medium chemical resistance, medium physical properties
Extremely expensive, poor physical properties, poor vs. some ketones, esters, amines
Aromatics, chlorinated solvents, also aliphatics and alcohols
Norfoil (Silver Shield)
Excellent chemical resistance
Poor fit, easily punctures, poor grip, stiff
Use for Hazmat work
Electrical Protective Gloves
Protector gloves must be worn over insulating gloves. An exception is when using Class 0 gloves, under limited-use conditions, where small equipment and parts manipulation necessitate unusually high finger dexterity. But, it’s important to note that extra care must be taken while visually examining the glove. Also, make sure to avoid handling sharp objects.
Any other class of glove may be used for similar work without protector gloves if the employer can demonstrate that the possibility of physical damage to the gloves is small and if the class of glove is one class higher than that required for the voltage involved. Insulating gloves that have been used without protector gloves may not be used at a higher voltage until they have been tested.
Cut Resistant Gloves
If employees are subject to sharp objects in the workplace, such as metal banding, sheet metal, or even razor blades, it is advised to wear a cut protection glove.
There are many different rating for cut protection gloves, I explain the ratings below:
In many countries around the world, it is widely recognized that wearing protective equipment in various working environments is essential to protect the health and safety of workers. This is especially true in hazardous environments such as confined spaces, and in certain industries such as the oil and gas, marine, energy and petrochemical industries.
Regardless of the environment however, the benefits of wearing personal protective equipment are the same. Whether the equipment in question is protective clothing or breathing equipment, it plays an essential role in protecting employees from injuries and illnesses.
The type of equipment used in a workplace will all depend on the legislation of the country where the employees work. Some countries have strict regulations that absolutely must always be adhered to to prevent injury and even death.
In the first instance, certain items of apparatus used by employees can prevent both short term and long-term harm to the respiratory system. Breathing equipment is an essential component of this kind of protection.
One example of where this is useful in the short term is in environments which are impossible to breathe in unaided, for example in areas where there is a very limited oxygen supply or the presence of poisonous gases. In these scenarios, breathing equipment is essential for directly protecting workers from immediate harm or loss of life.
A concrete illustration of this situation is seen with firefighters, who regularly work in extremely dangerous environments where smoke inhalation could cause fatalities in a short period of time. On the other hand, respiratory protective equipment can also help avoid the long-term negative consequences of inhaling certain toxic substances.
In some places, air may be breathable but there may be exposure to gases or fumes that can cause health issues over several months or years. Respiratory protective equipment can also be used when entering environments where the air quality is unknown, offering optimal protection of health in potentially dangerous situations.
Other common types of personal protective equipment include clothing to protect against falling objects and dangerous substances encountering the body. A common example of this type of equipment is the hard hat or helmet, which is worn in a number of different environments where wearers could potentially receive a serious or fatal blow to the head.
Clothing worn on the body can also protect against toxic substances encountering the skin, for example in chemical plants. Whereas a falling object can have immediate consequences for the employee who is not wearing a hard hat, protective clothing can protect against instant harm such as burns and the effects of long-term exposure to harmful substances.
Another sensitive area of the body is the eyes, which must also be protected in various hazardous environments in a vast number of different industries. One example of this is in the manufacturing industry, where sparks, flying particles of various substances and toxic liquids can enter the eyes.
The consequences of all these foreign objects entering the eyes can be severe, therefore equipment such as protective goggles or glasses can be essential in many different environments.
In addition to the examples mentioned above, there are many other types of personal protective equipment that can be used to protect the health and safety of workers in dangerous work environments. To determine which is the most appropriate, companies need to carry out detailed risk assessments before they invest in equipment.
The importance of protective breathing equipment, clothing, and eye protection is essential in preventing employees from encountering a range of toxic materials or life-threatening situations – the right personal protective equipment can, and does, save many, many lives each year.
View and download the Basics of PPE Training below:

 Confined Space Entry is a complex topic to say the least. These entries are different every time even though the same equipment is used each time. The same crew may be utilized as well, however conditions more than likely will differ on each occasion. These could include toxic fumes, gas leaks and reduced oxygen levels. These conditions are so detrimental that you could pass out at any moment. For this reason, permits are required as enforced by Confined Space Regulation.